


FAQ
-
You need to charge your instax Link WIDE 2™ before using it for the first time. Charge it for about two hours to make sure the battery is full before use.
-
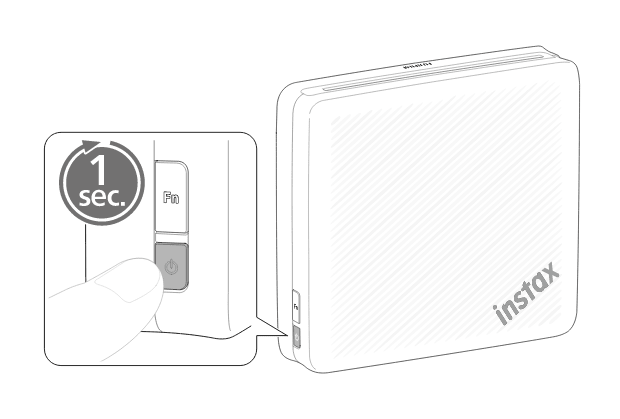
The power button is on the lower side, indicated with a power symbol. Press and hold the power button for about 1 second to switch the printer on/off.
-
Follow the procedure below.
-
1)
Launch the instax Link WIDE™ app and tap the settings icon “
 ” on the upper right.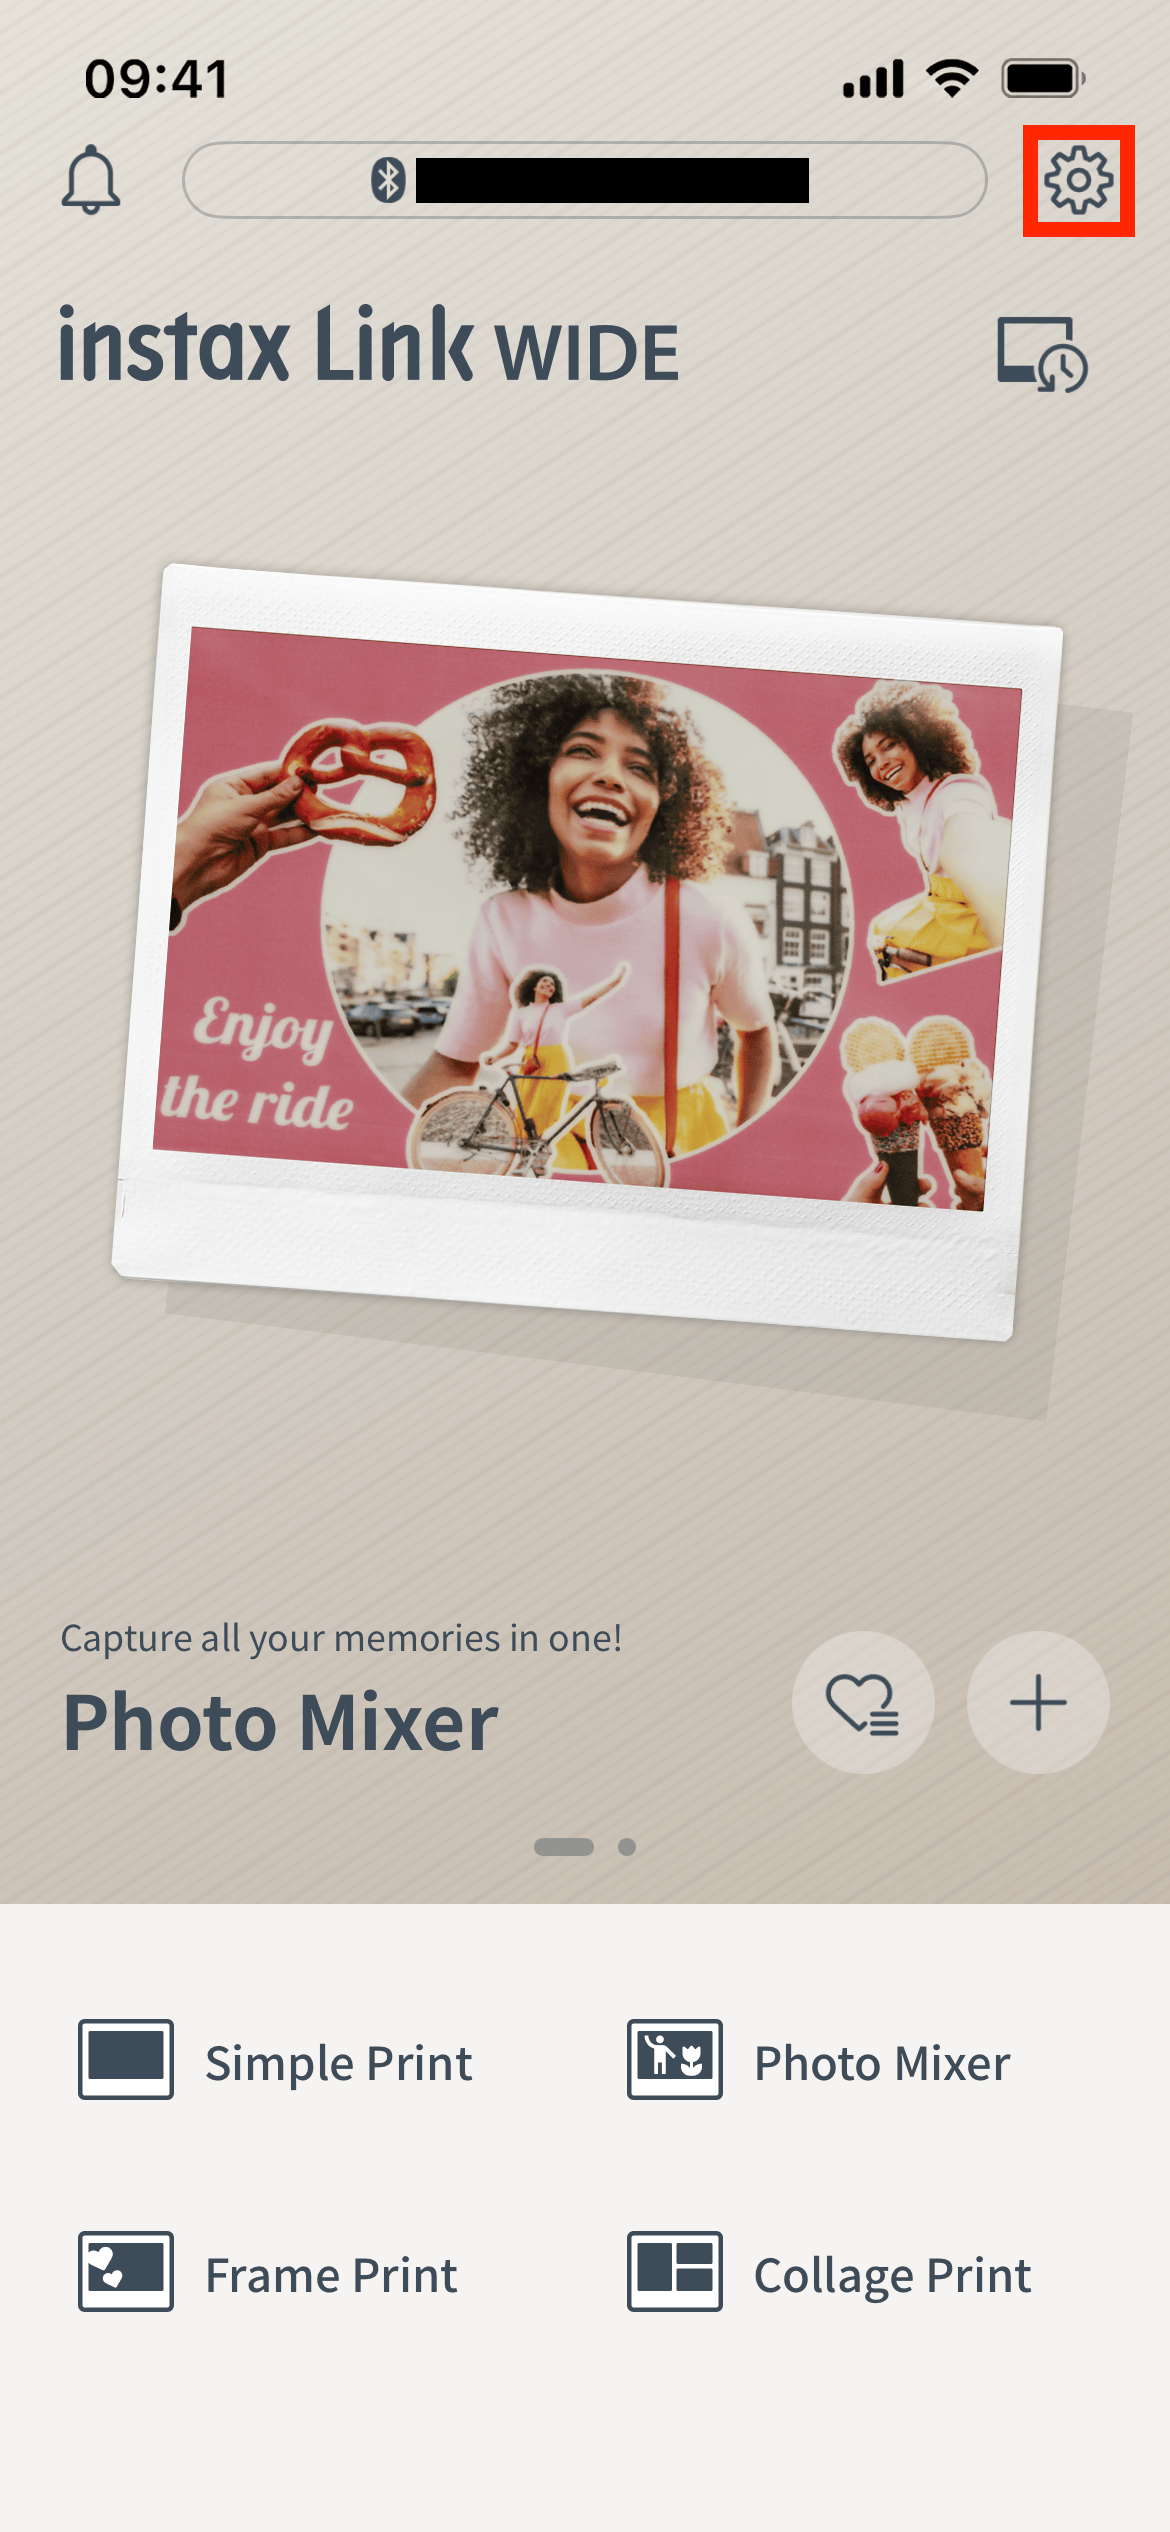
-
2)
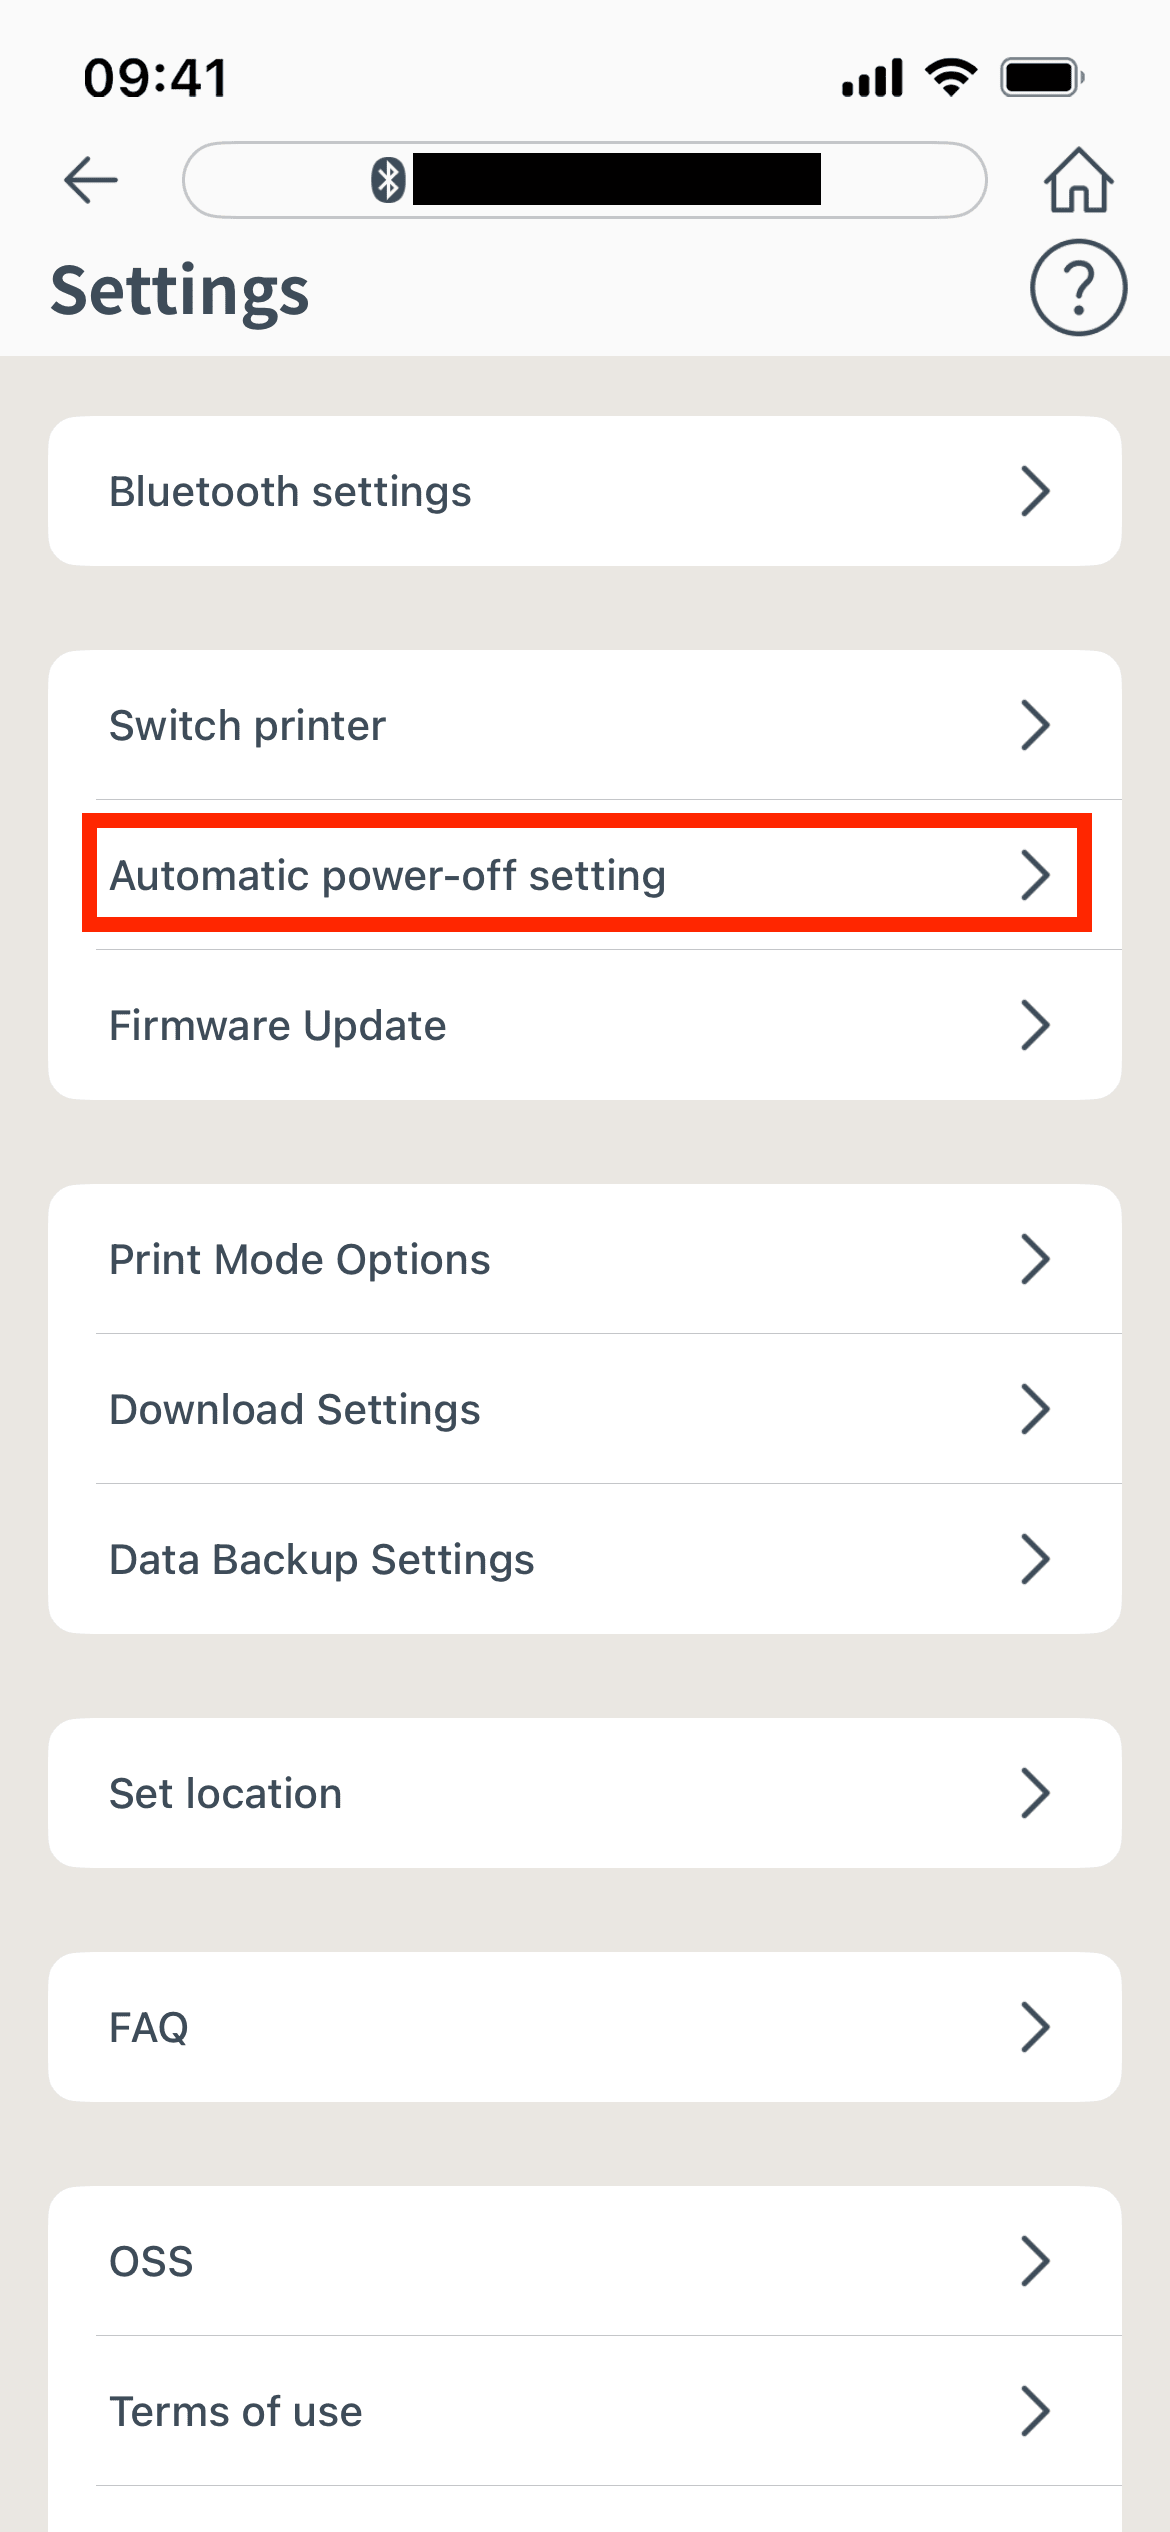
You will be taken to the Settings menu screen. Tap "Printer Auto Power Off Settings." (A printer must be connected.)
-
3)
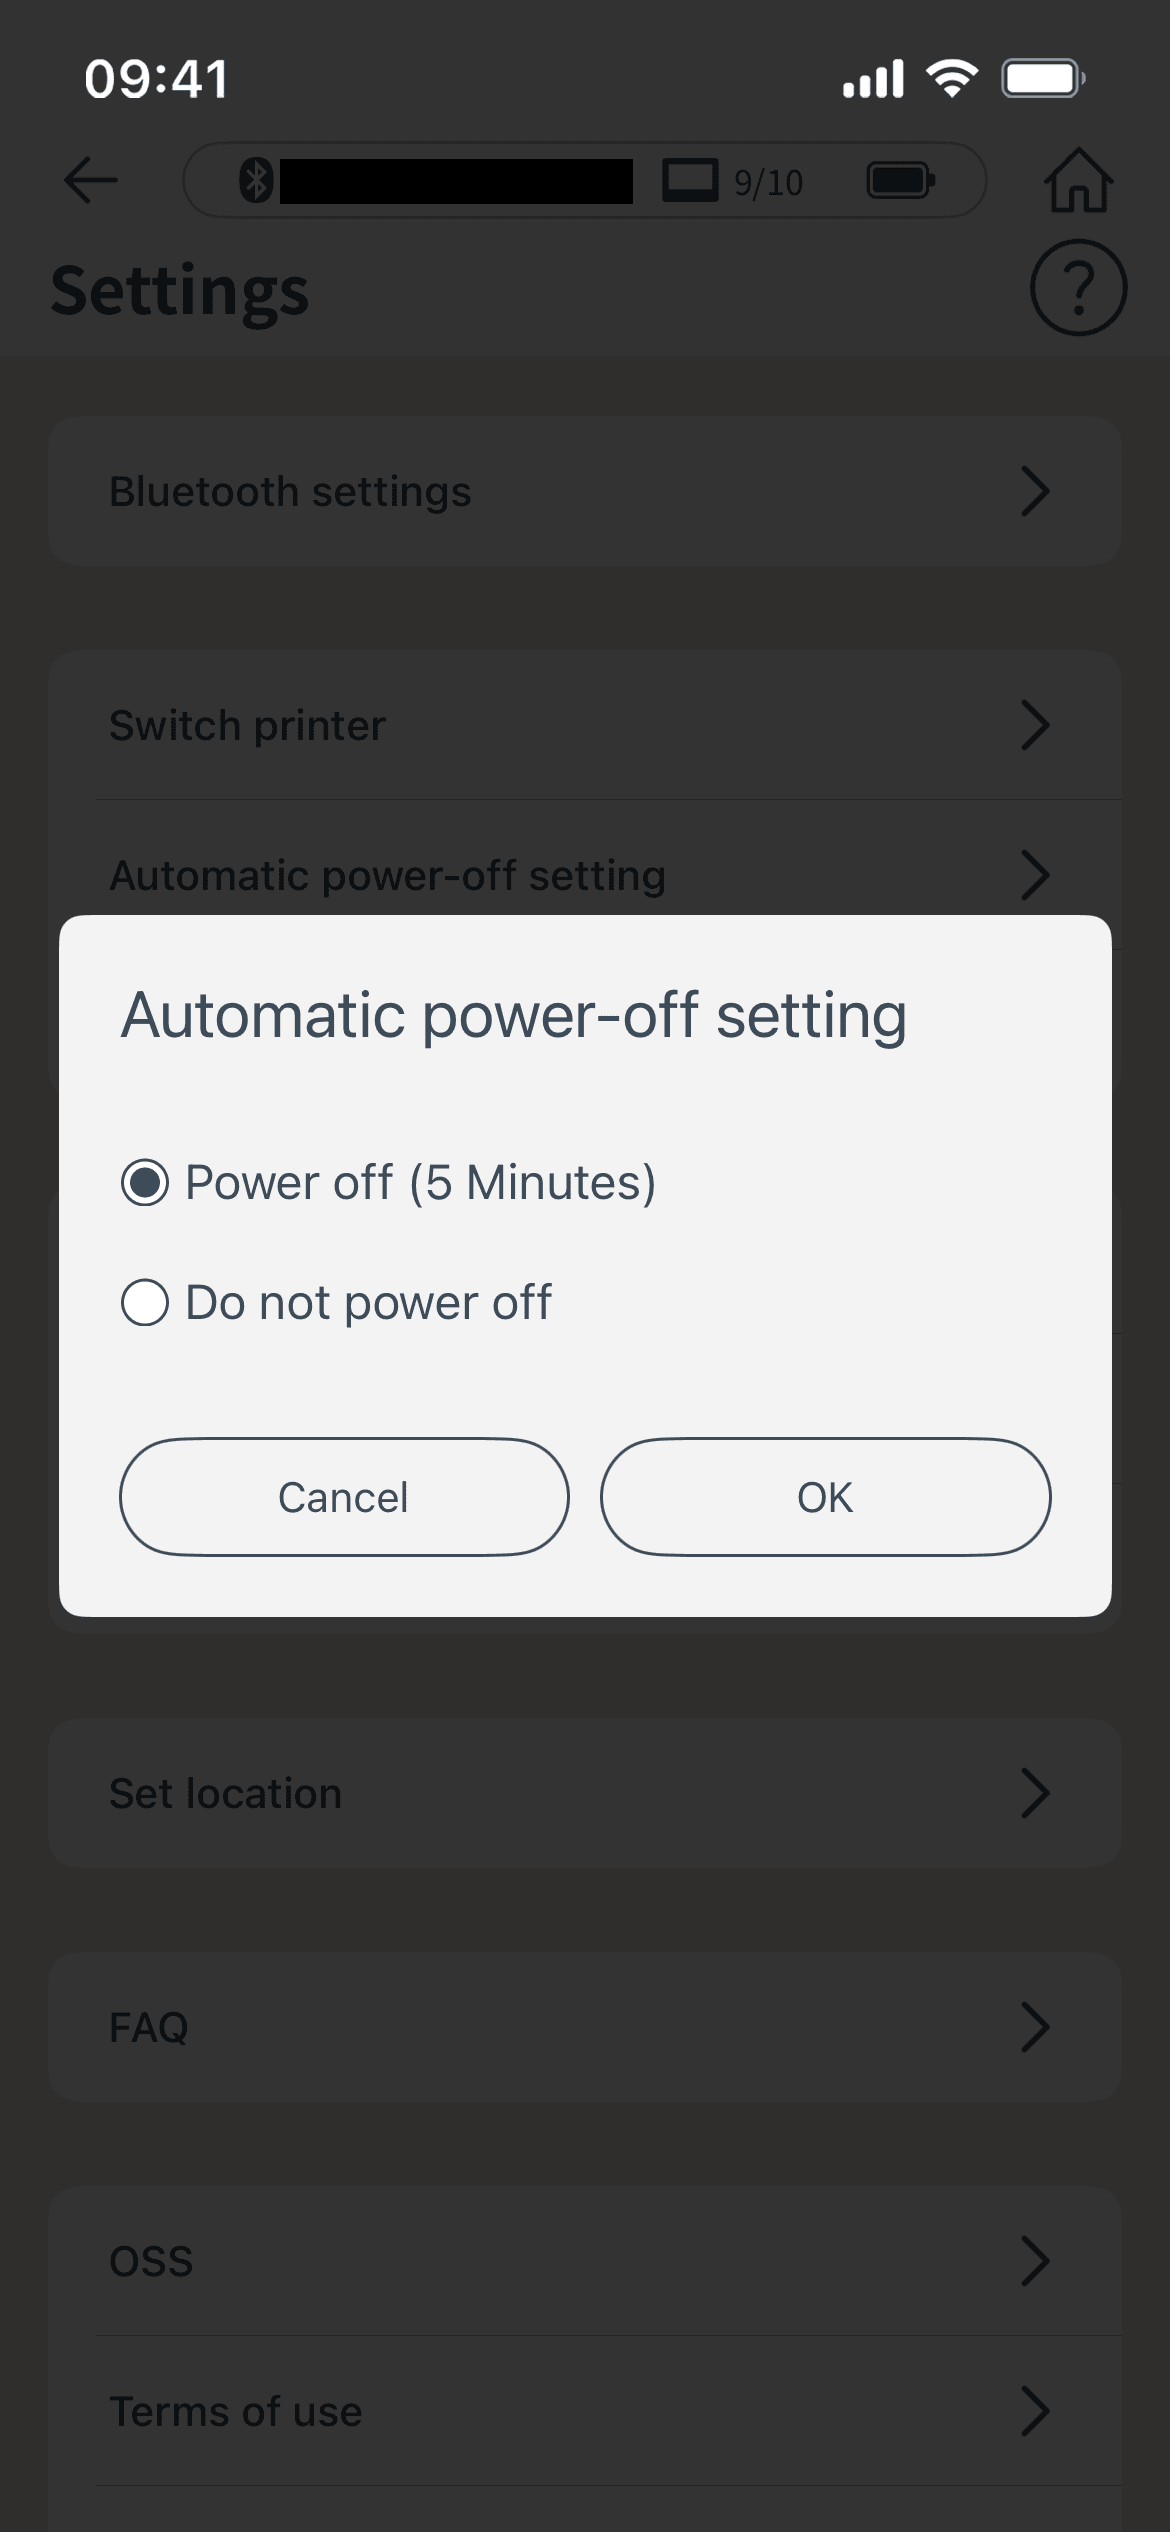
Select whether or not to turn off the printer automatically.
-
1)
-
Your smartphone OS will request the following permissions when the「instax Link WIDE™」App is opened for the first time after installing or updating the app. Some or all of the app’s functions may be unavailable if these permissions are not granted. Check your current settings and adjust as required.
For iPhone users:
- 1) Tap the “Settings” button on the home screen.
- 2) Scroll down to the “Link WIDE” icon and tap on the icon.
- 3) Check that the “Photos”, “Bluetooth” and “Camera” permissions are set as shown below.
iOS17-26 iOS16 “Photos” permissions Select "Full Access" Select "All photos" “Bluetooth” permissions Slide right Slide right “Camera” permissions Slide right Slide right For Android users:
- 1) Tap the “Settings” button on the home screen.
-
2)
Android 11 or earlier: Tap “Apps & notifications”.
Android 12 or higher: Tap “Apps”. - 3) Tap “Display all apps”.
- 4) Scroll down to the “Link WIDE” icon and tap on the icon.
- 5) Tap “Permissions”.
- 6) Check that the “Camera”, “Photos and videos” ,“Files and media”,“Storage” and “Location” permissions are set as shown below.
AndroidOS13-17 AndroidOS12 "Camera" permissions Select "Allow only while using the app" Select "Allow only while using the app" "Microphone" permissions Select "Allow only while using the app" Select "Allow only while using the app" "Location" permissions Select "Allow only while using the app" and slide "Use precise location" to the right Select "Allow only while using the app" and slide "Use precise location" to the right "Photos and videos"permissions Select "Always Allow Everything" - "Files and media" permissions - Select "Allow access only" "Storage" permissions - - "Nearby devices" permissions Select "Allow" Select "Allow" -
Follow the procedure below.
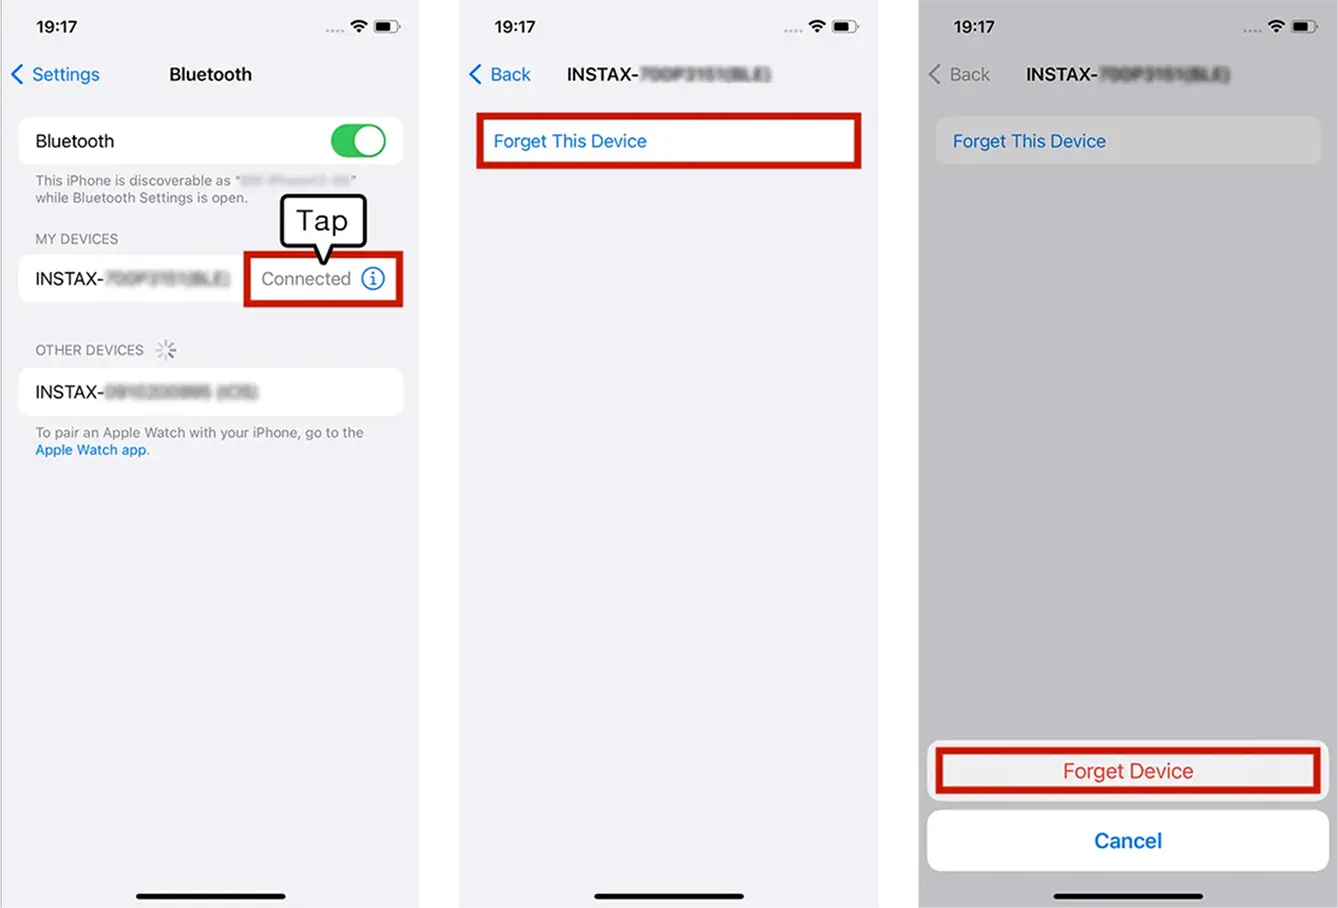
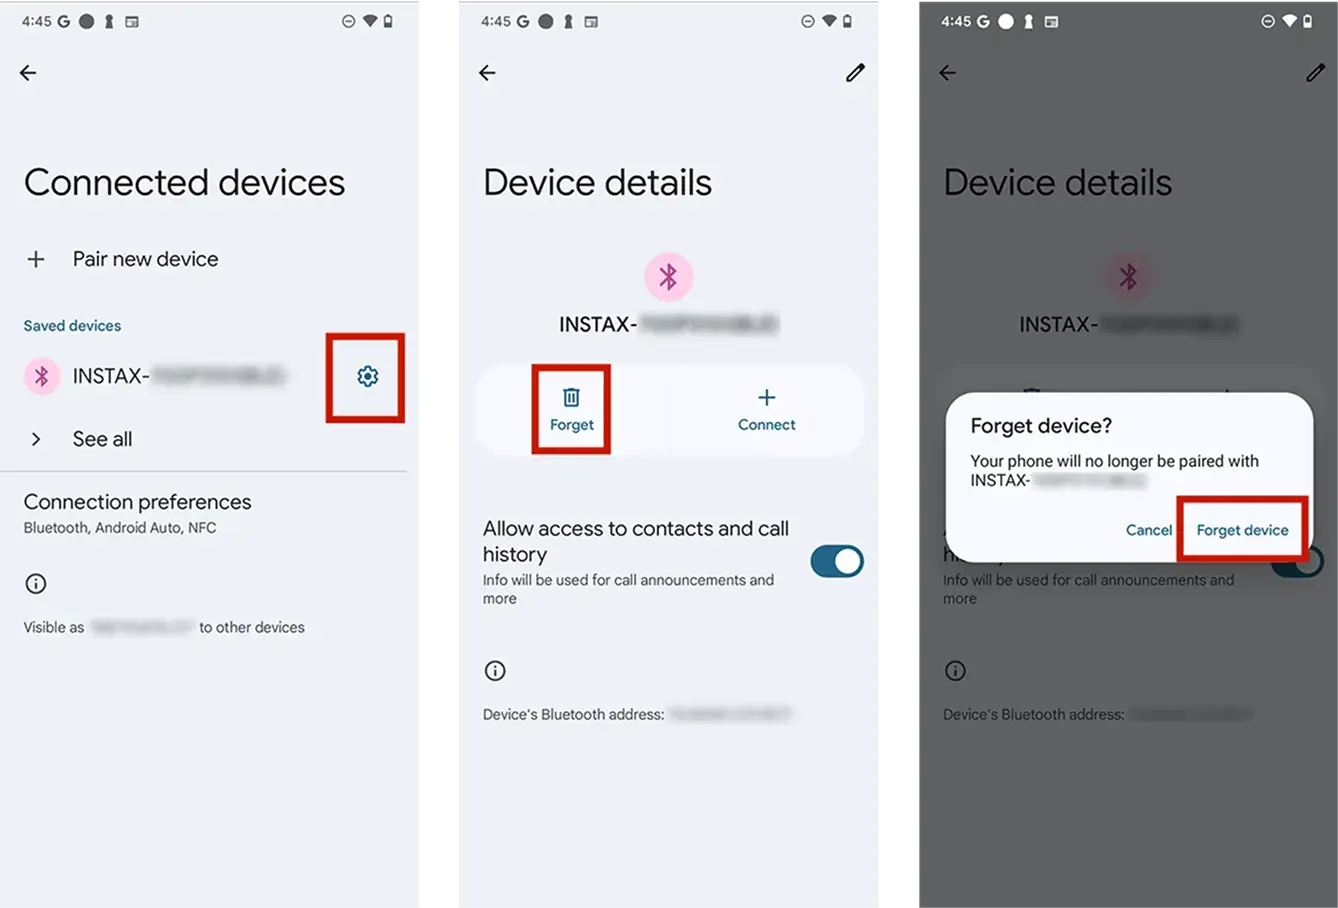
- 1) Open the Bluetooth settings screen of a smartphone you wish to connect. Check if any previously connected instax Link WIDE™ printers are displayed. The printers are displayed as INSTAX-XXXXXXX. Delete any other Link printers that are displayed.
- 2) Restart the smartphone that you wish to connect.
- 3) Turn on Bluetooth via the smartphone’s settings (if Bluetooth is already turned on, turn it off and on again).
- 4) Turn on the printer's power while holding down the button.
- 5) Open the instax Link WIDE™ app on the smartphone, select Bluetooth settings from the app’s settings screen then press the search button.
The printer can now be paired with the instax Link WIDE™ app.
Example) With iOS 17
Example) With Android 14
-
One. To connect another smartphone, you will need to unpair the smartphone that is currently connected.
-
Location needs to be enabled in order to connect to the printer through Bluetooth.
-
If pop-up windows appear twice, select “pair” on both windows.
-
After connecting the printer, check the version update status via the “Check Printer Version Update” option in the app settings.
-
1)
Launch the instax Link WIDE™ app and tap the icon in the upper right corner.
- 2) The settings menu screen will appear. Tap “Check Printer Version Update” within the “Printer Settings” tab to check.
-
1)
Launch the instax Link WIDE™ app and tap the
-
-
1)
Launch the instax Link WIDE™ app and tap the icon on the upper right.
-
2)
Once you are in the settings menu screen, access the “Printer settings” tab, then tap “Check for firmware updates”.
(Make sure your printer is connected when performing this step.) - 3) If a new firmware update is available, follow the on-screen instructions to update.
-
1)
Launch the instax Link WIDE™ app and tap the
-
【Supported extensions】
Supports video files taken with iOS / Android devices (not compatible with Android HDR video).
【Video length】
Three minutes or less -
Refer to the table below.
LED light indicator Printer Status Blue LED (flashing) Firmware is being updated Light blue and pink LED (pulsing) Reprinting Yellow LED (static - the printer will
turn off in 3-seconds)• Cannot be charged
• Low batteryYellow LED (flashing) • Film ejection error occurred -
Check battery level by pressing the function button on the side while the power is on.
*Please check the next sheet for the figures.LED light indicator Battery status Flashes green once Low battery level Flashes green twice Middle battery level Flashes green three times High battery level If your printer is connected to the instax Link WIDE™ app, you can also check the battery level from the app.
-
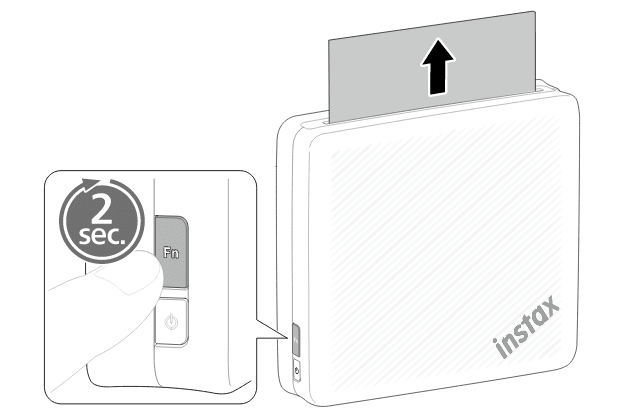
You can reprint an image you just printed simply by pressing & holding the function button for about 2 seconds.
-
There are no images to reprint. Reprint images are deleted when the power is turned off.
-
- ・ Photos in which the subject is clearly separated from the background
- ・ Photos that are not extremely tall or wide (photos narrower than 16:9)
- ・ High-resolution photos (512x512 pixels or larger)
Please note that the following types of photos may not crop properly:
- ・ Photos where it is difficult to determine what to crop (the main subject is unclear / other elements stand out)
- ・ Photos where the subject’s shape is not fully visible (too small / cut off at the edge of the frame / too close-up to see the whole subject)
- ・ Photos with multiple subjects that are close together or overlapping (difficult to separate them)
- ・ Photos with poor image quality due to blur, motion blur, darkness, or noise
- ・ Photos where the subject and background have similar colors or textures
-
-
1)
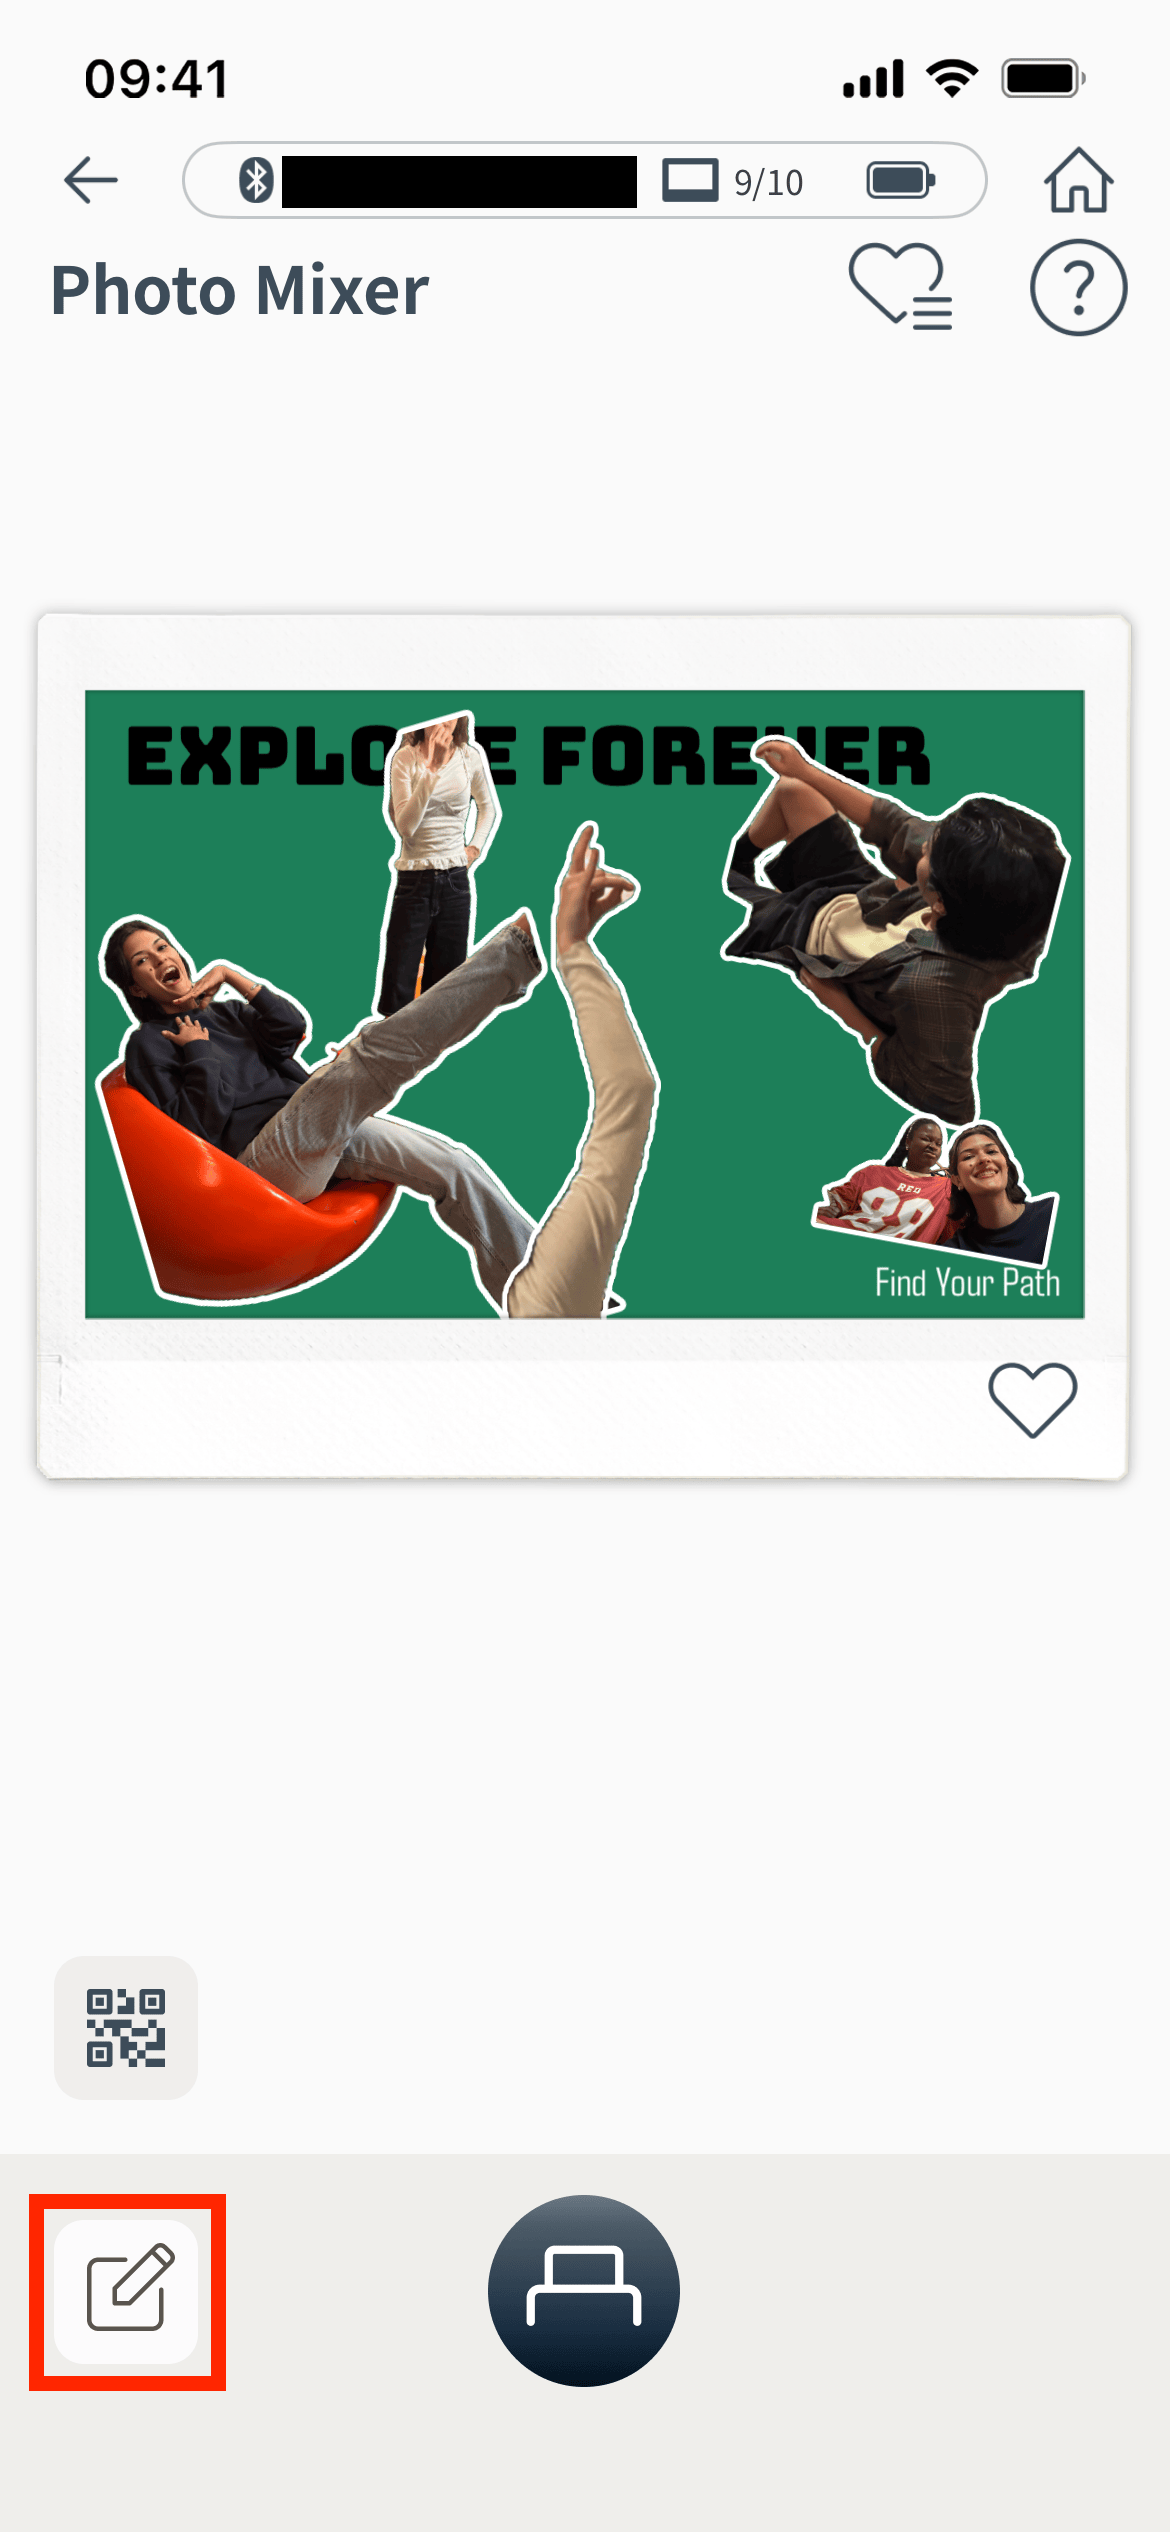
Tap the “Edit” button or an image to enter “Edit Mode.”
-
2)
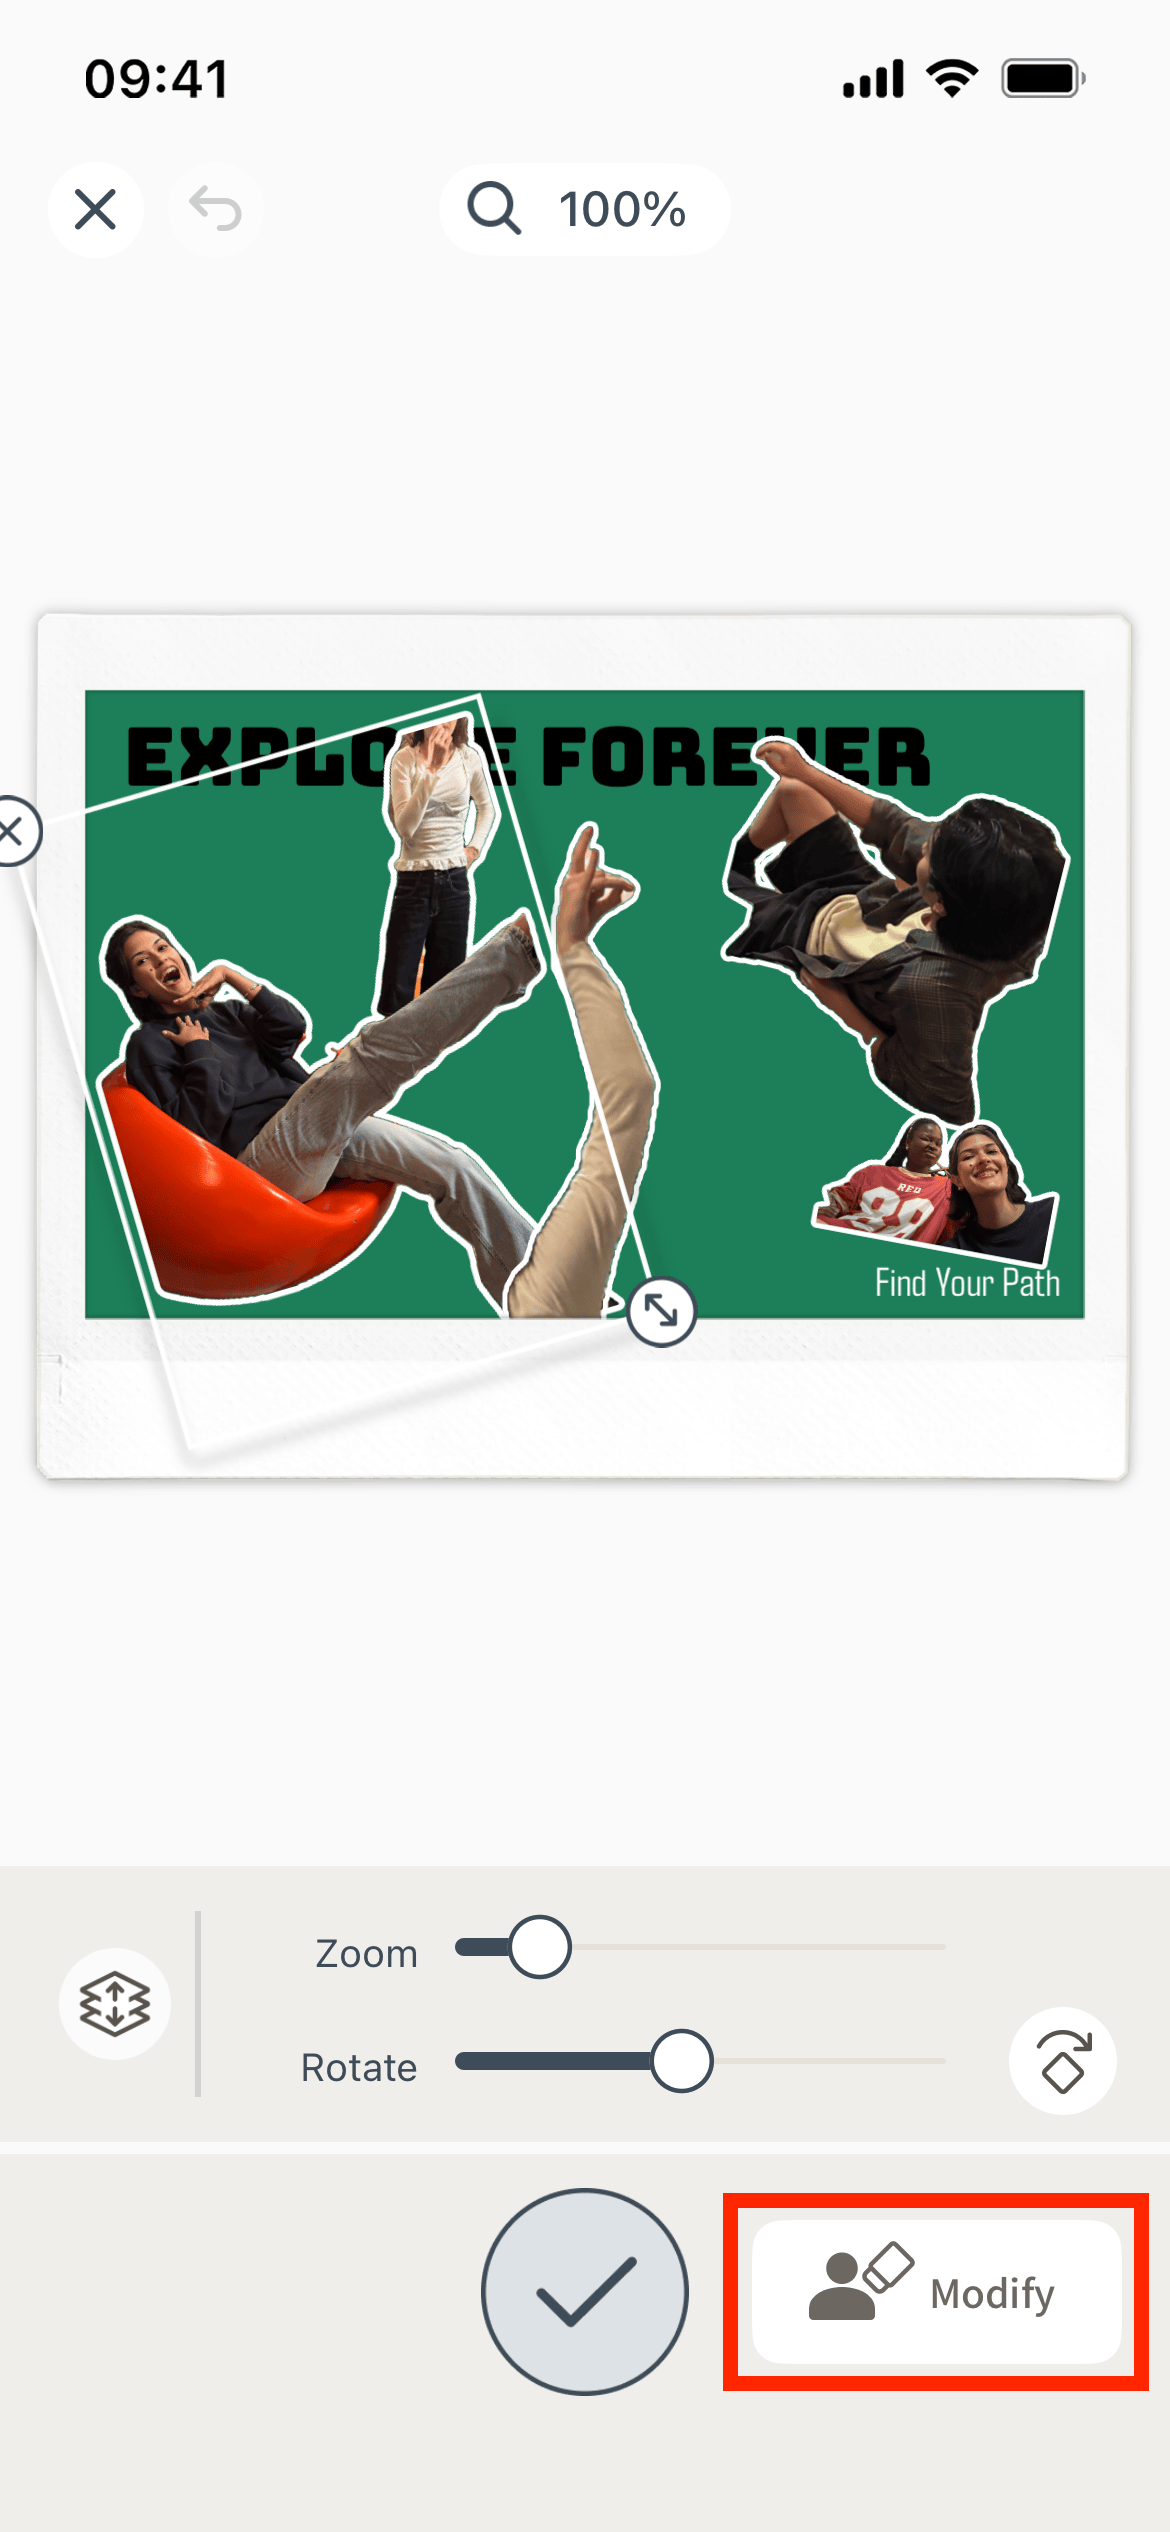
Tap the image you want to crop, then tap the “Modify” button in the lower-right corner.
-
3)
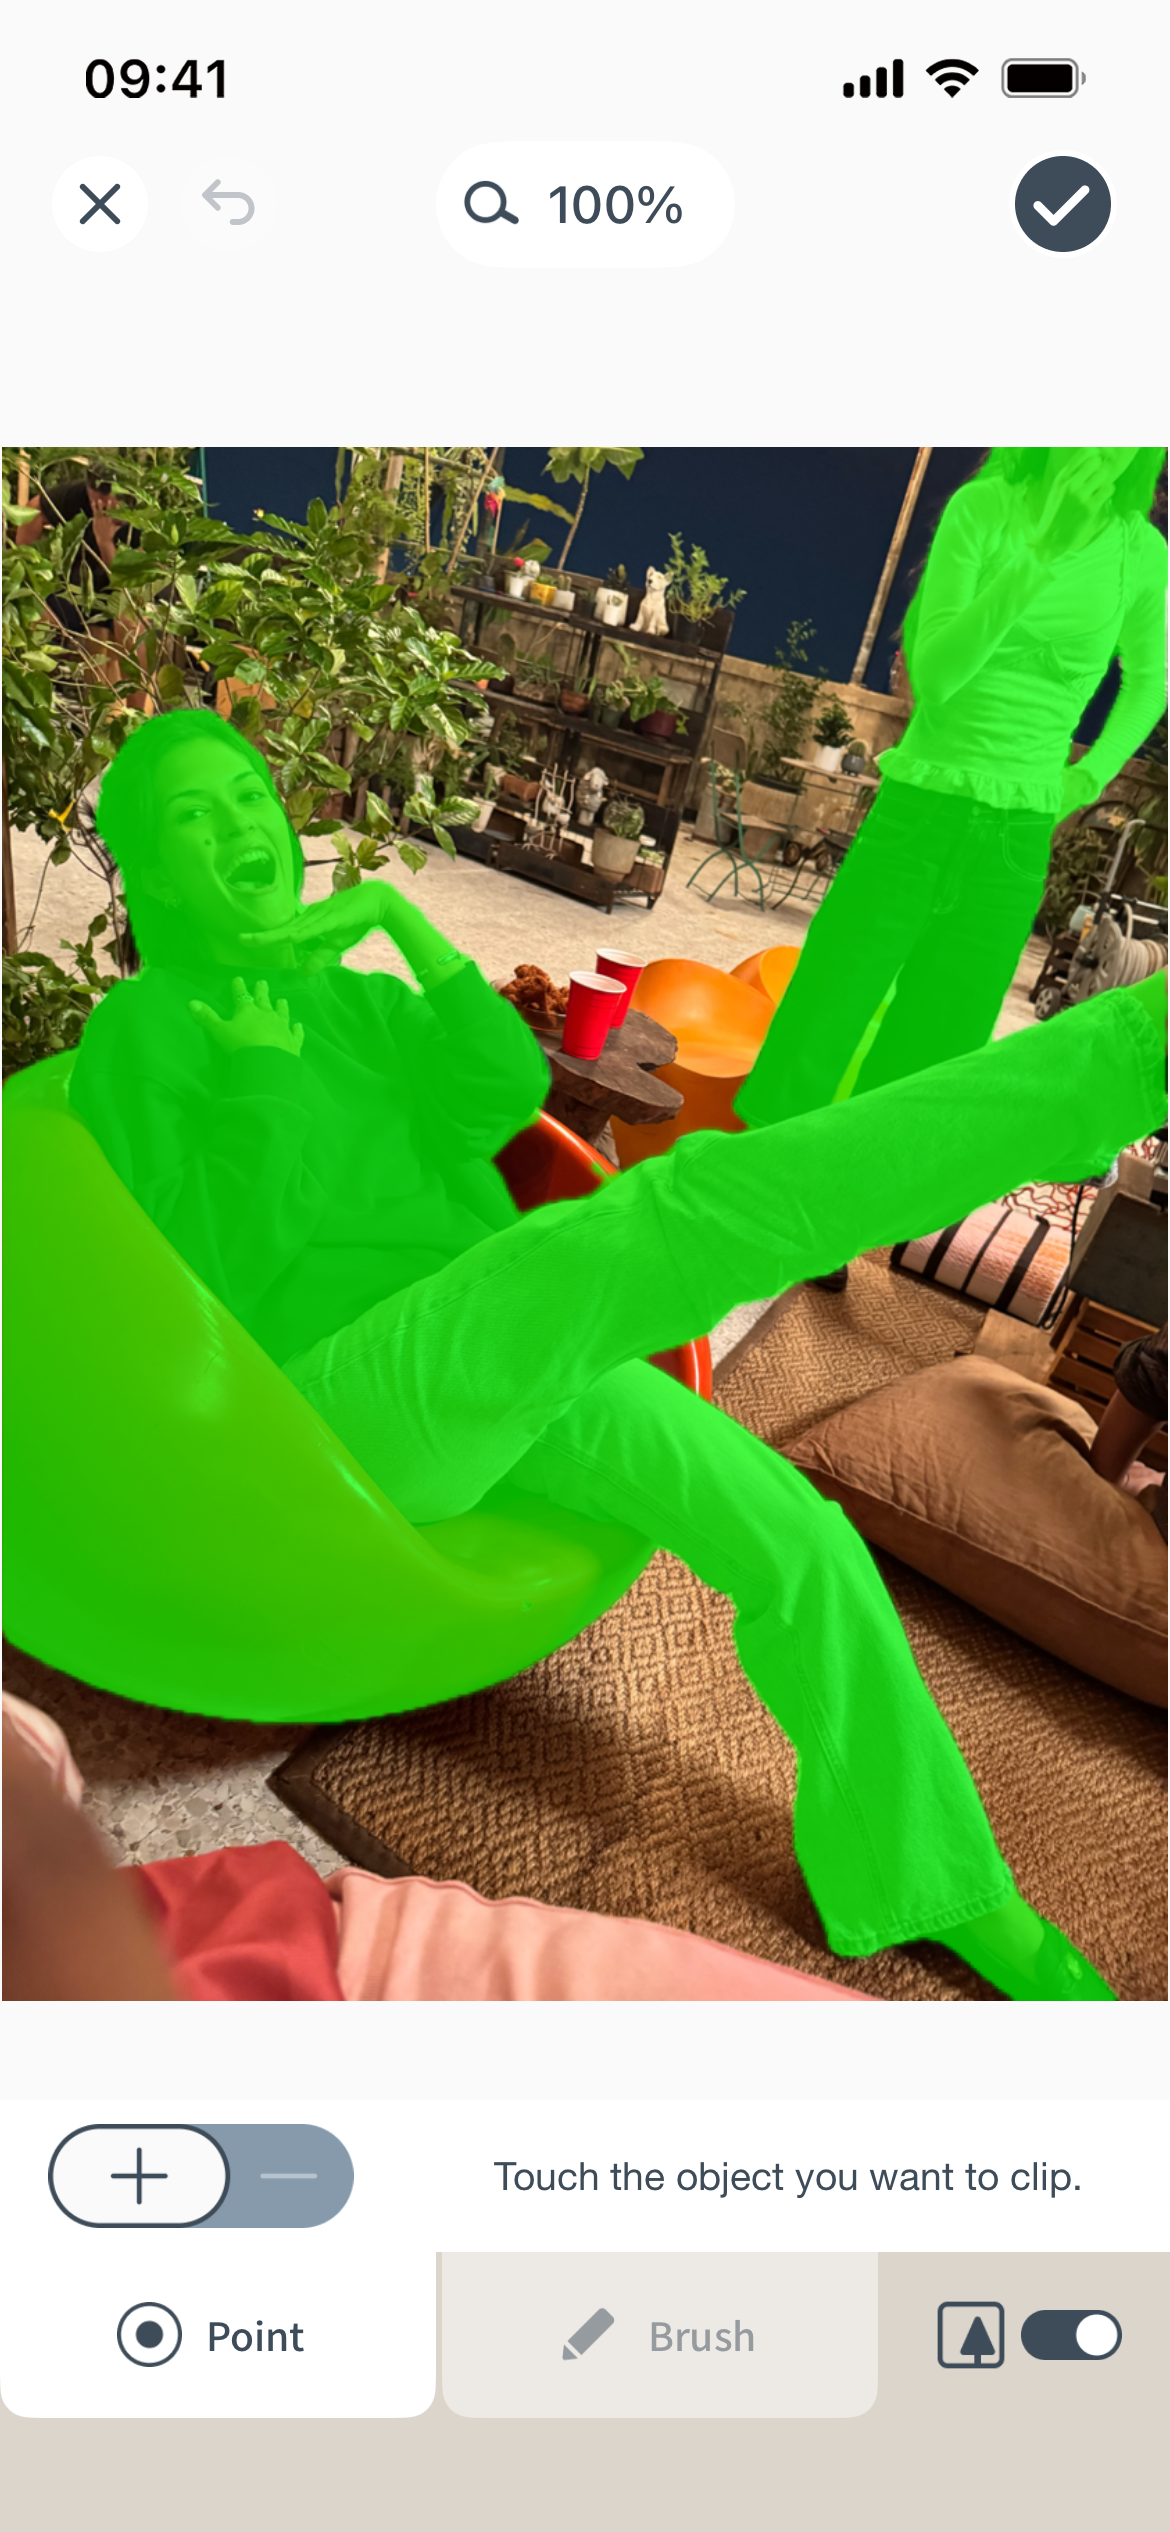
The area that will cropped automatically by the app is highlighted in green.
-
4)
To add a cropping area, set the switch to “+.”
To remove a cropping area, set the switch to “-.”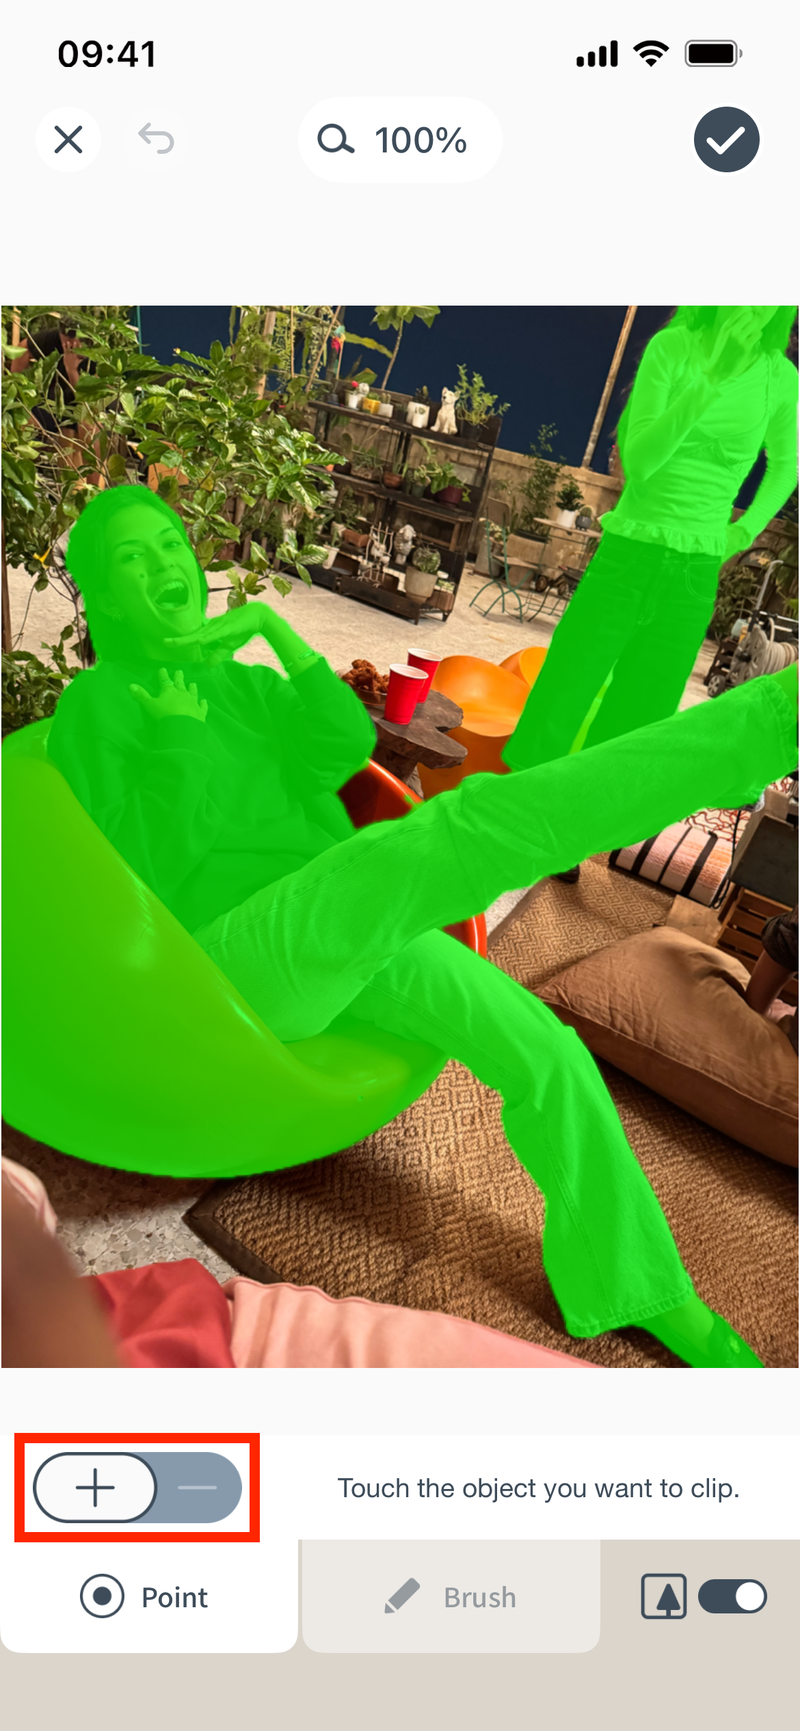
-
5)
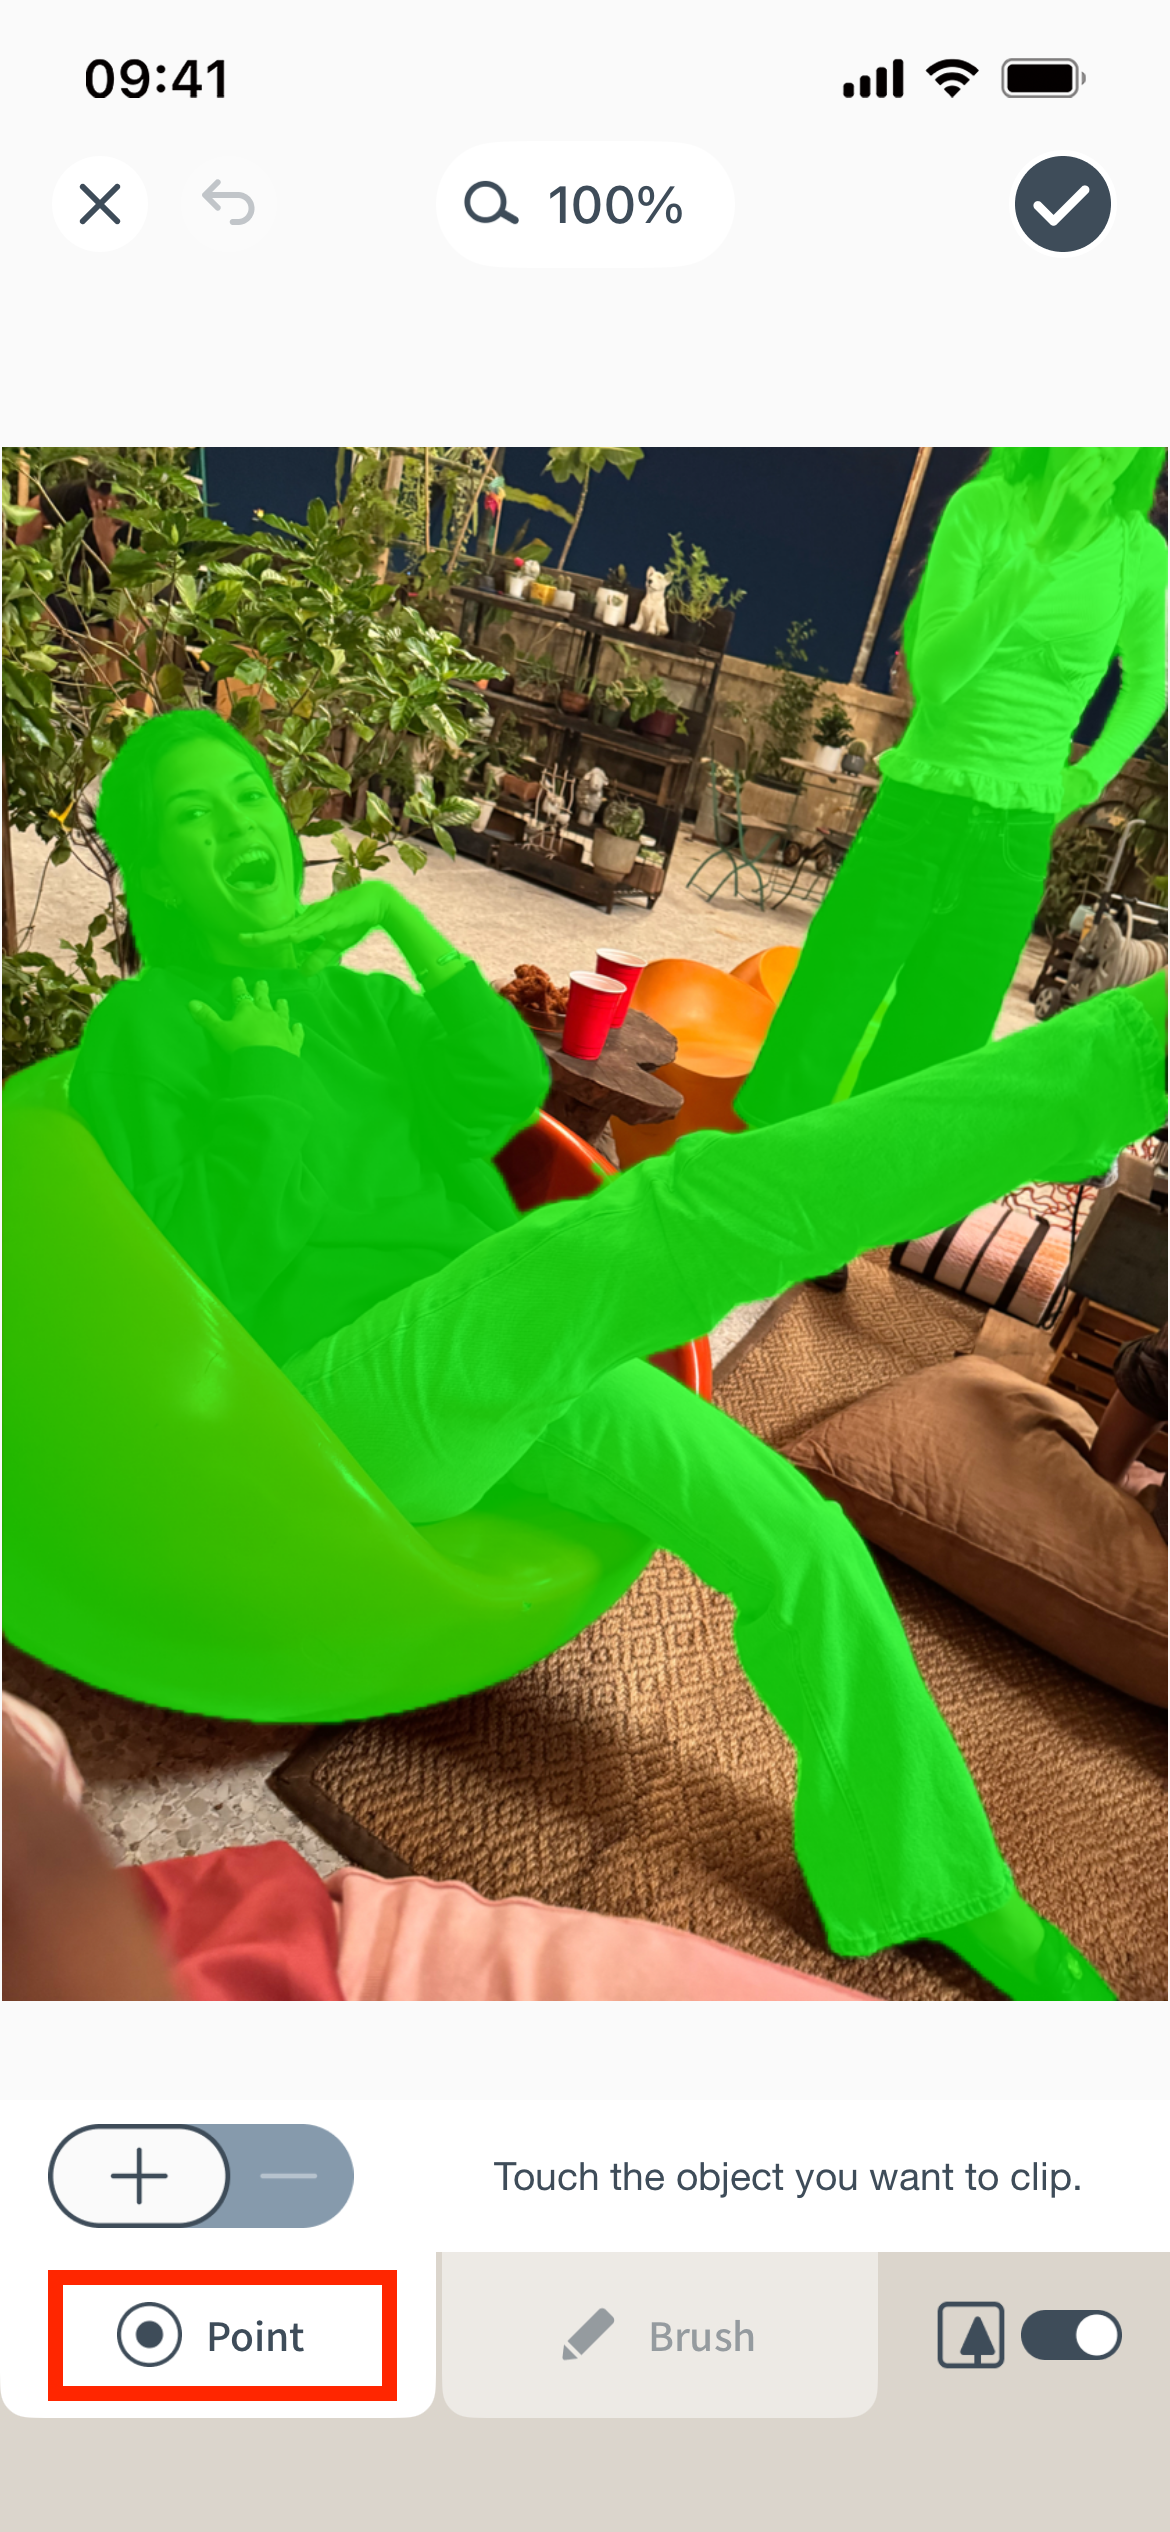
Tap the “Point” button, then touch the area you want to crop to select it (add or remove).
-
6)
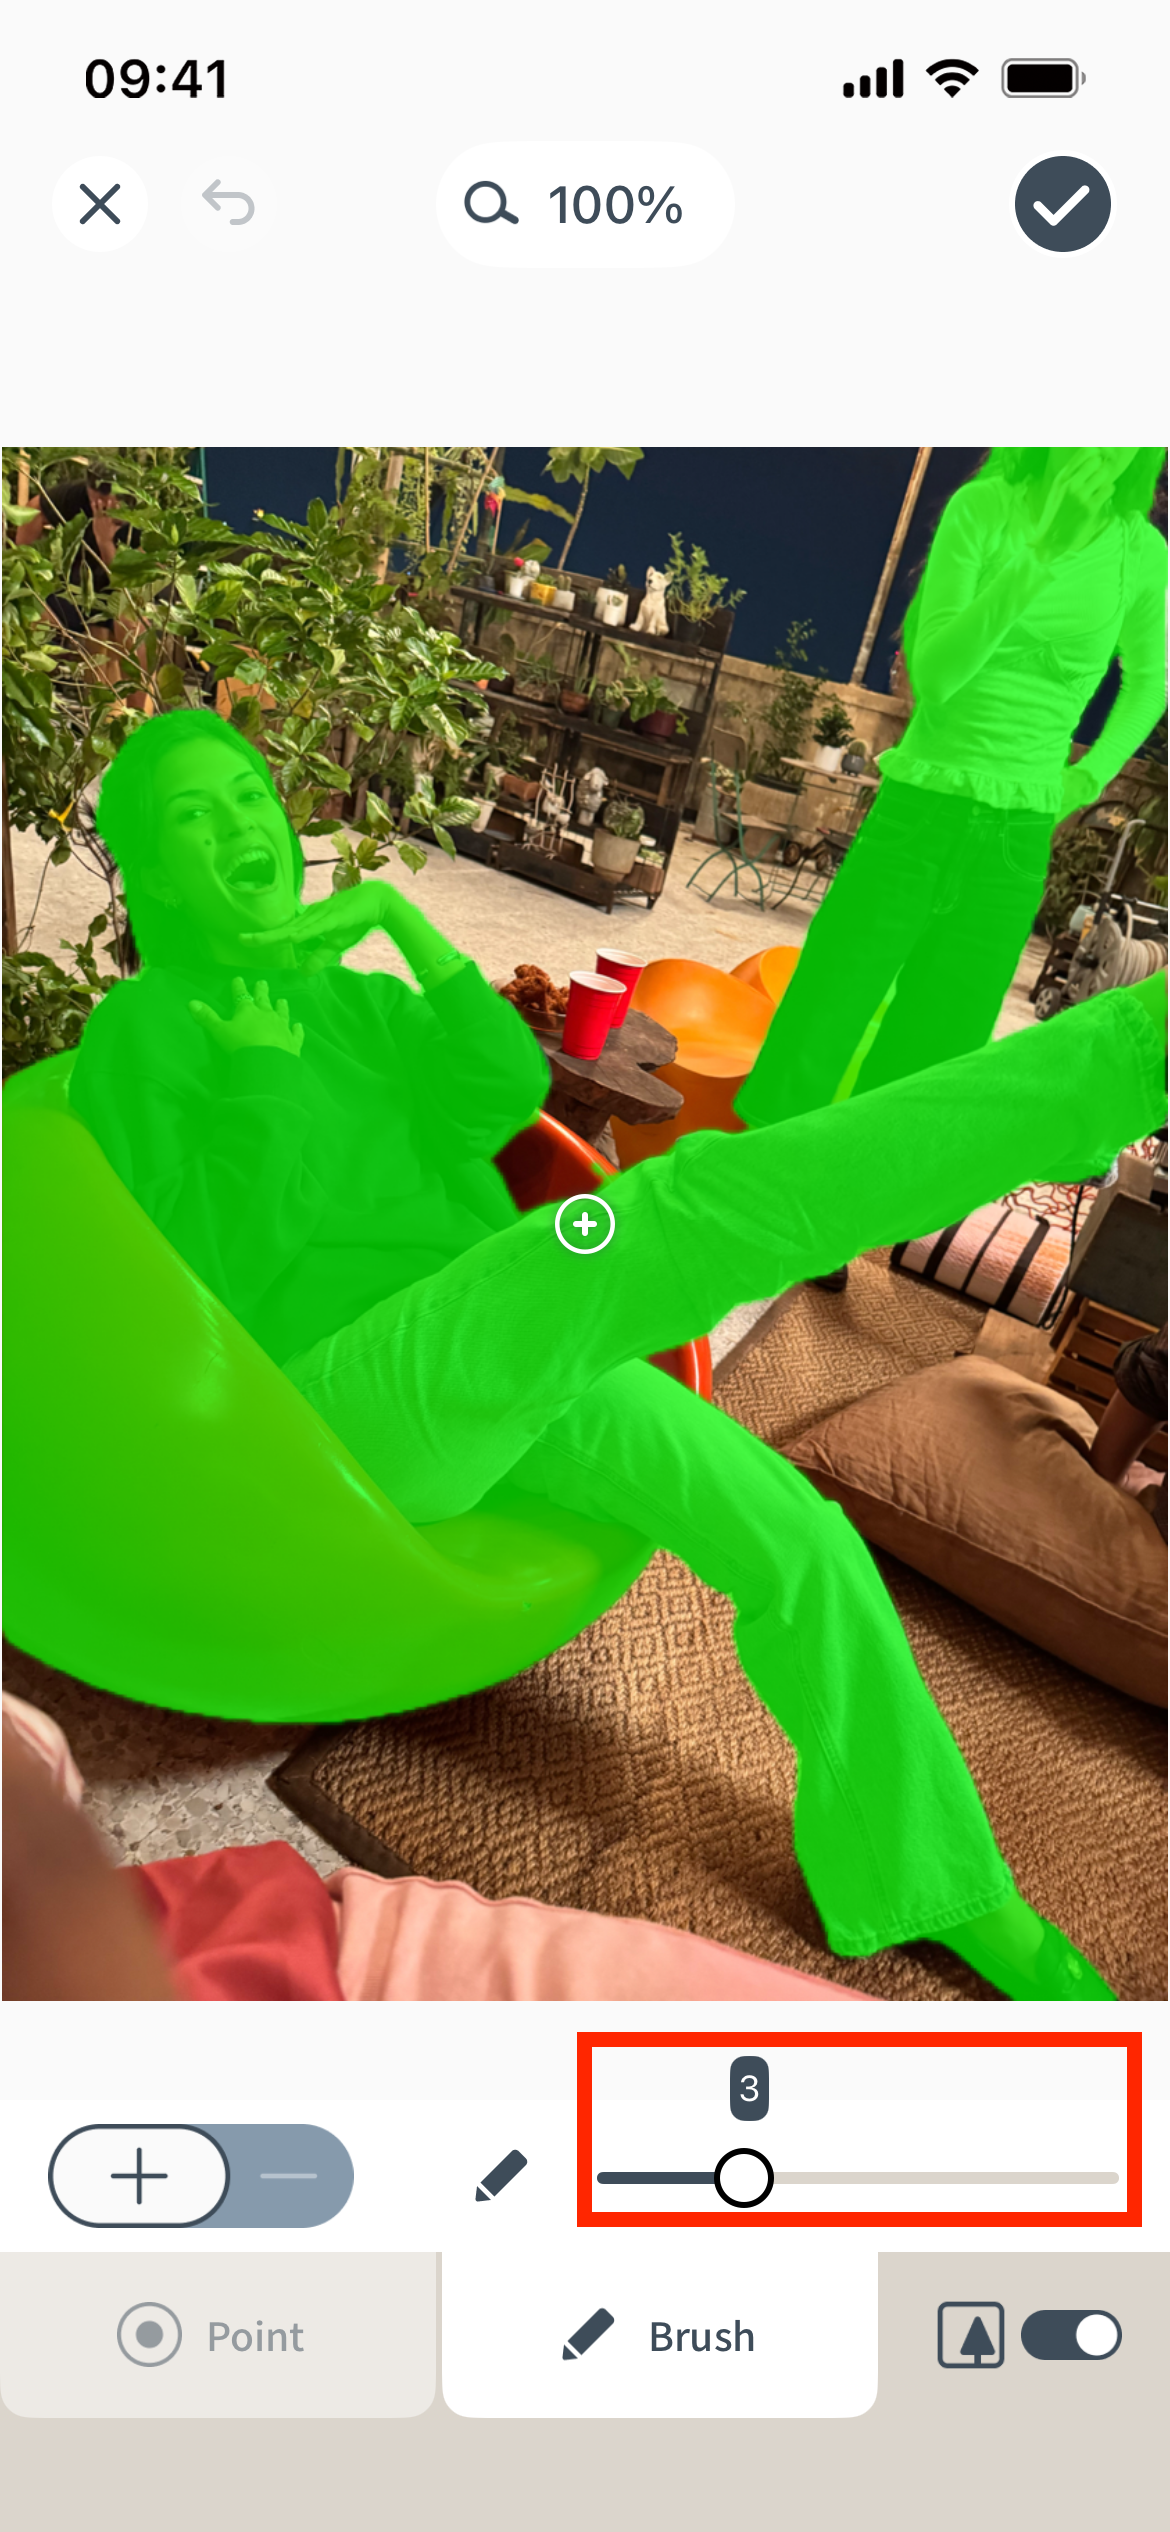
Tap the “Brush” button, then trace the area you want to crop with your finger to select it (add or remove). You can also adjust the line thickness.
-
7)
Use the “
 ” button to display only the images you’ve selected for cropping.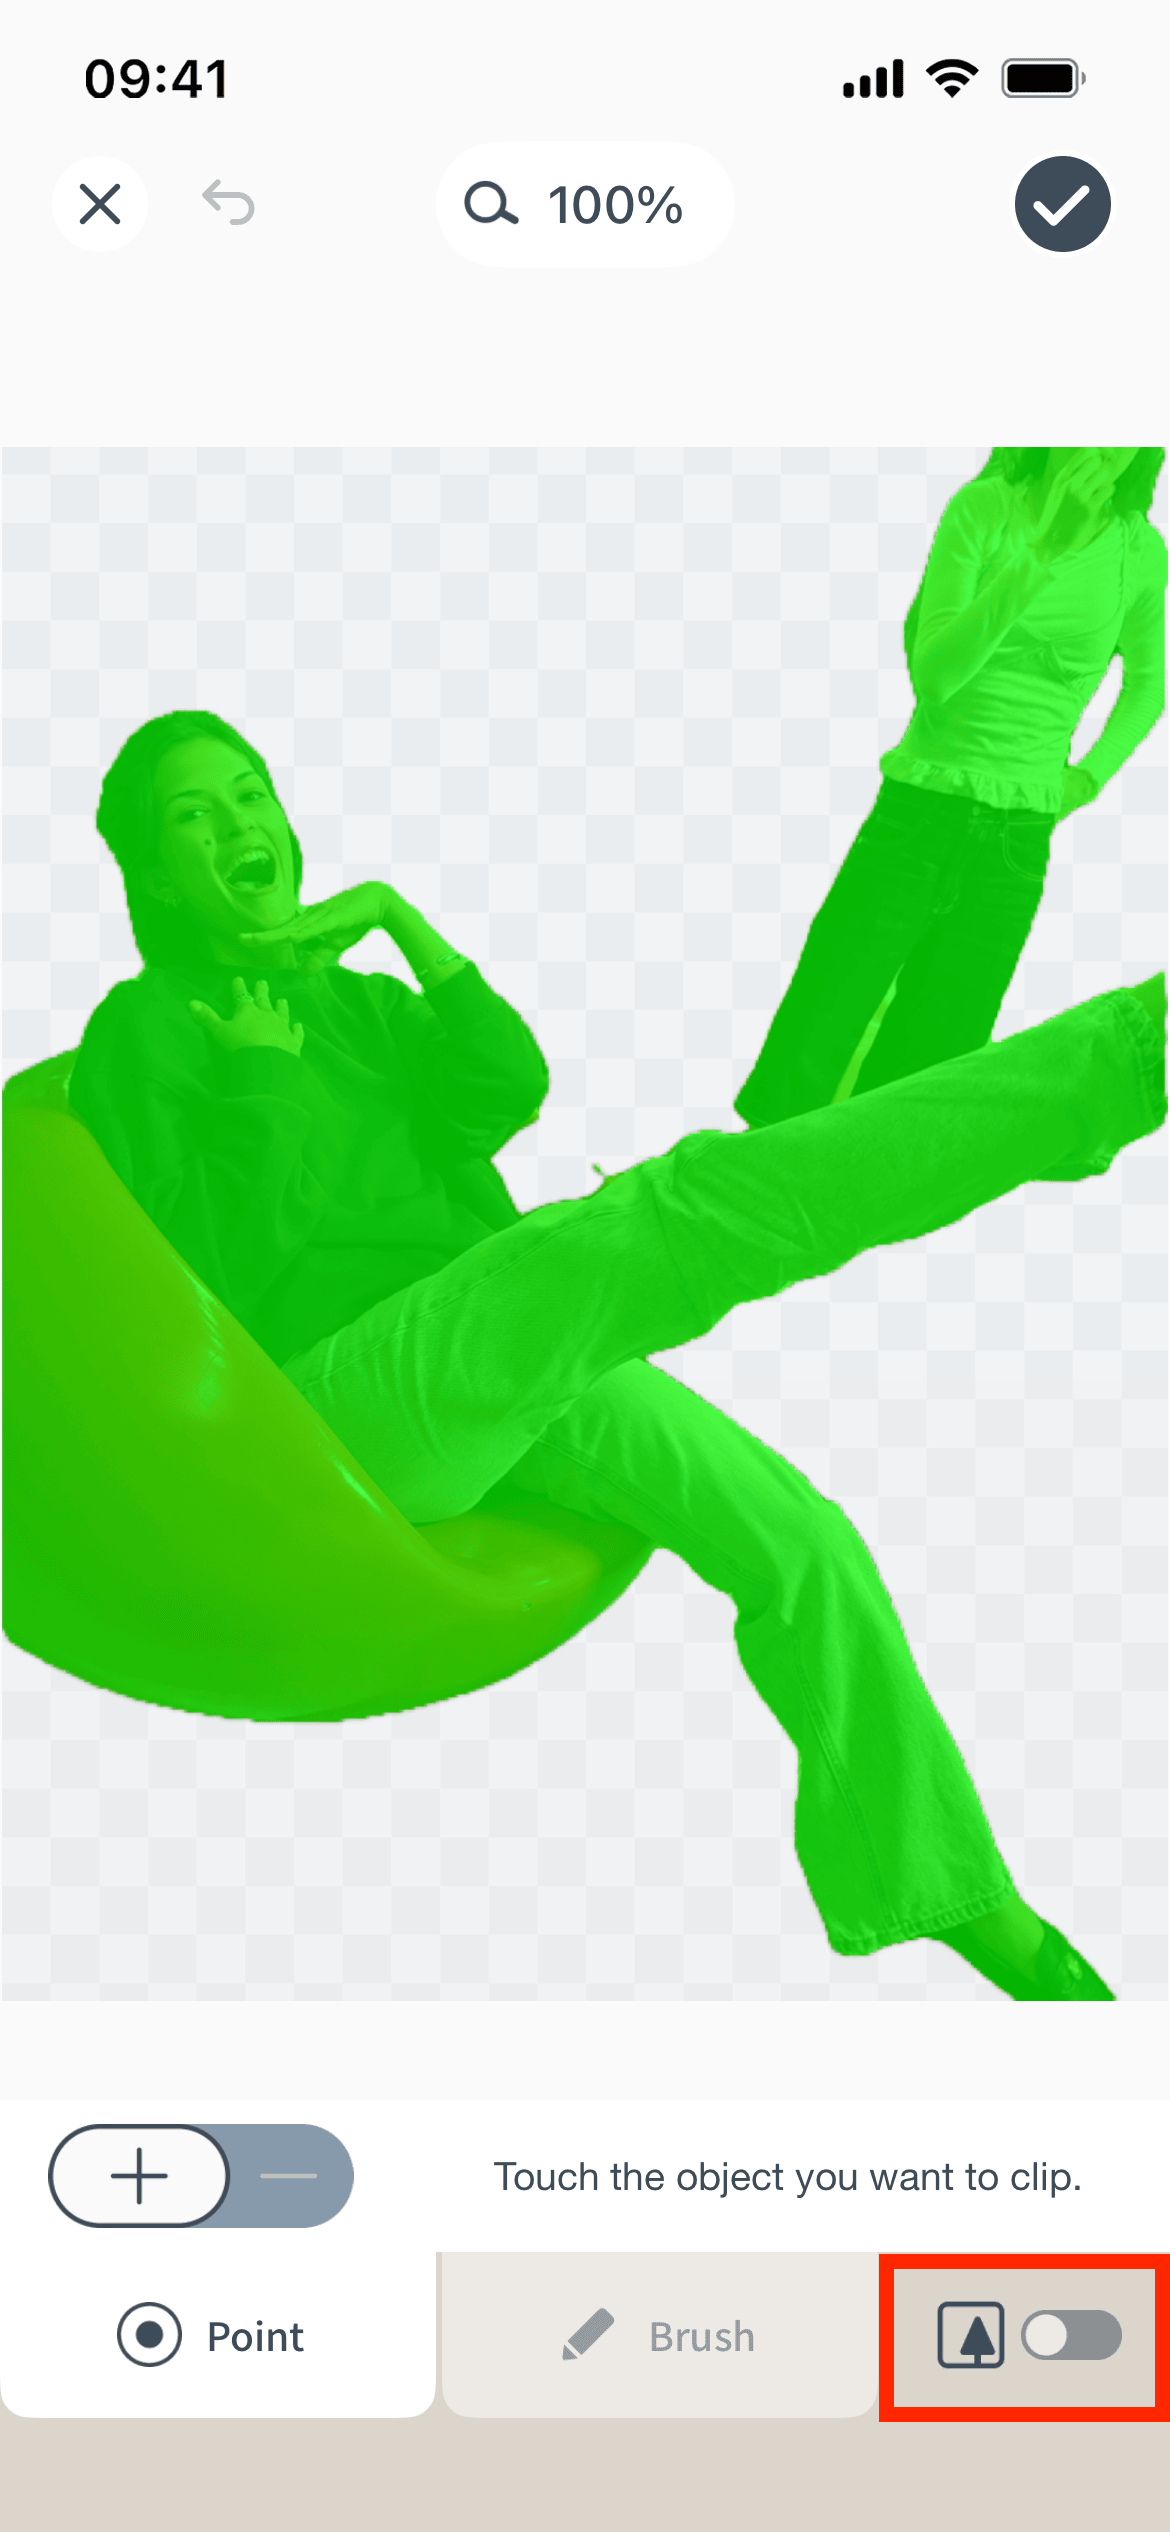
-
8)
Tap the “
 ” button to go back one step and make corrections (Undo function).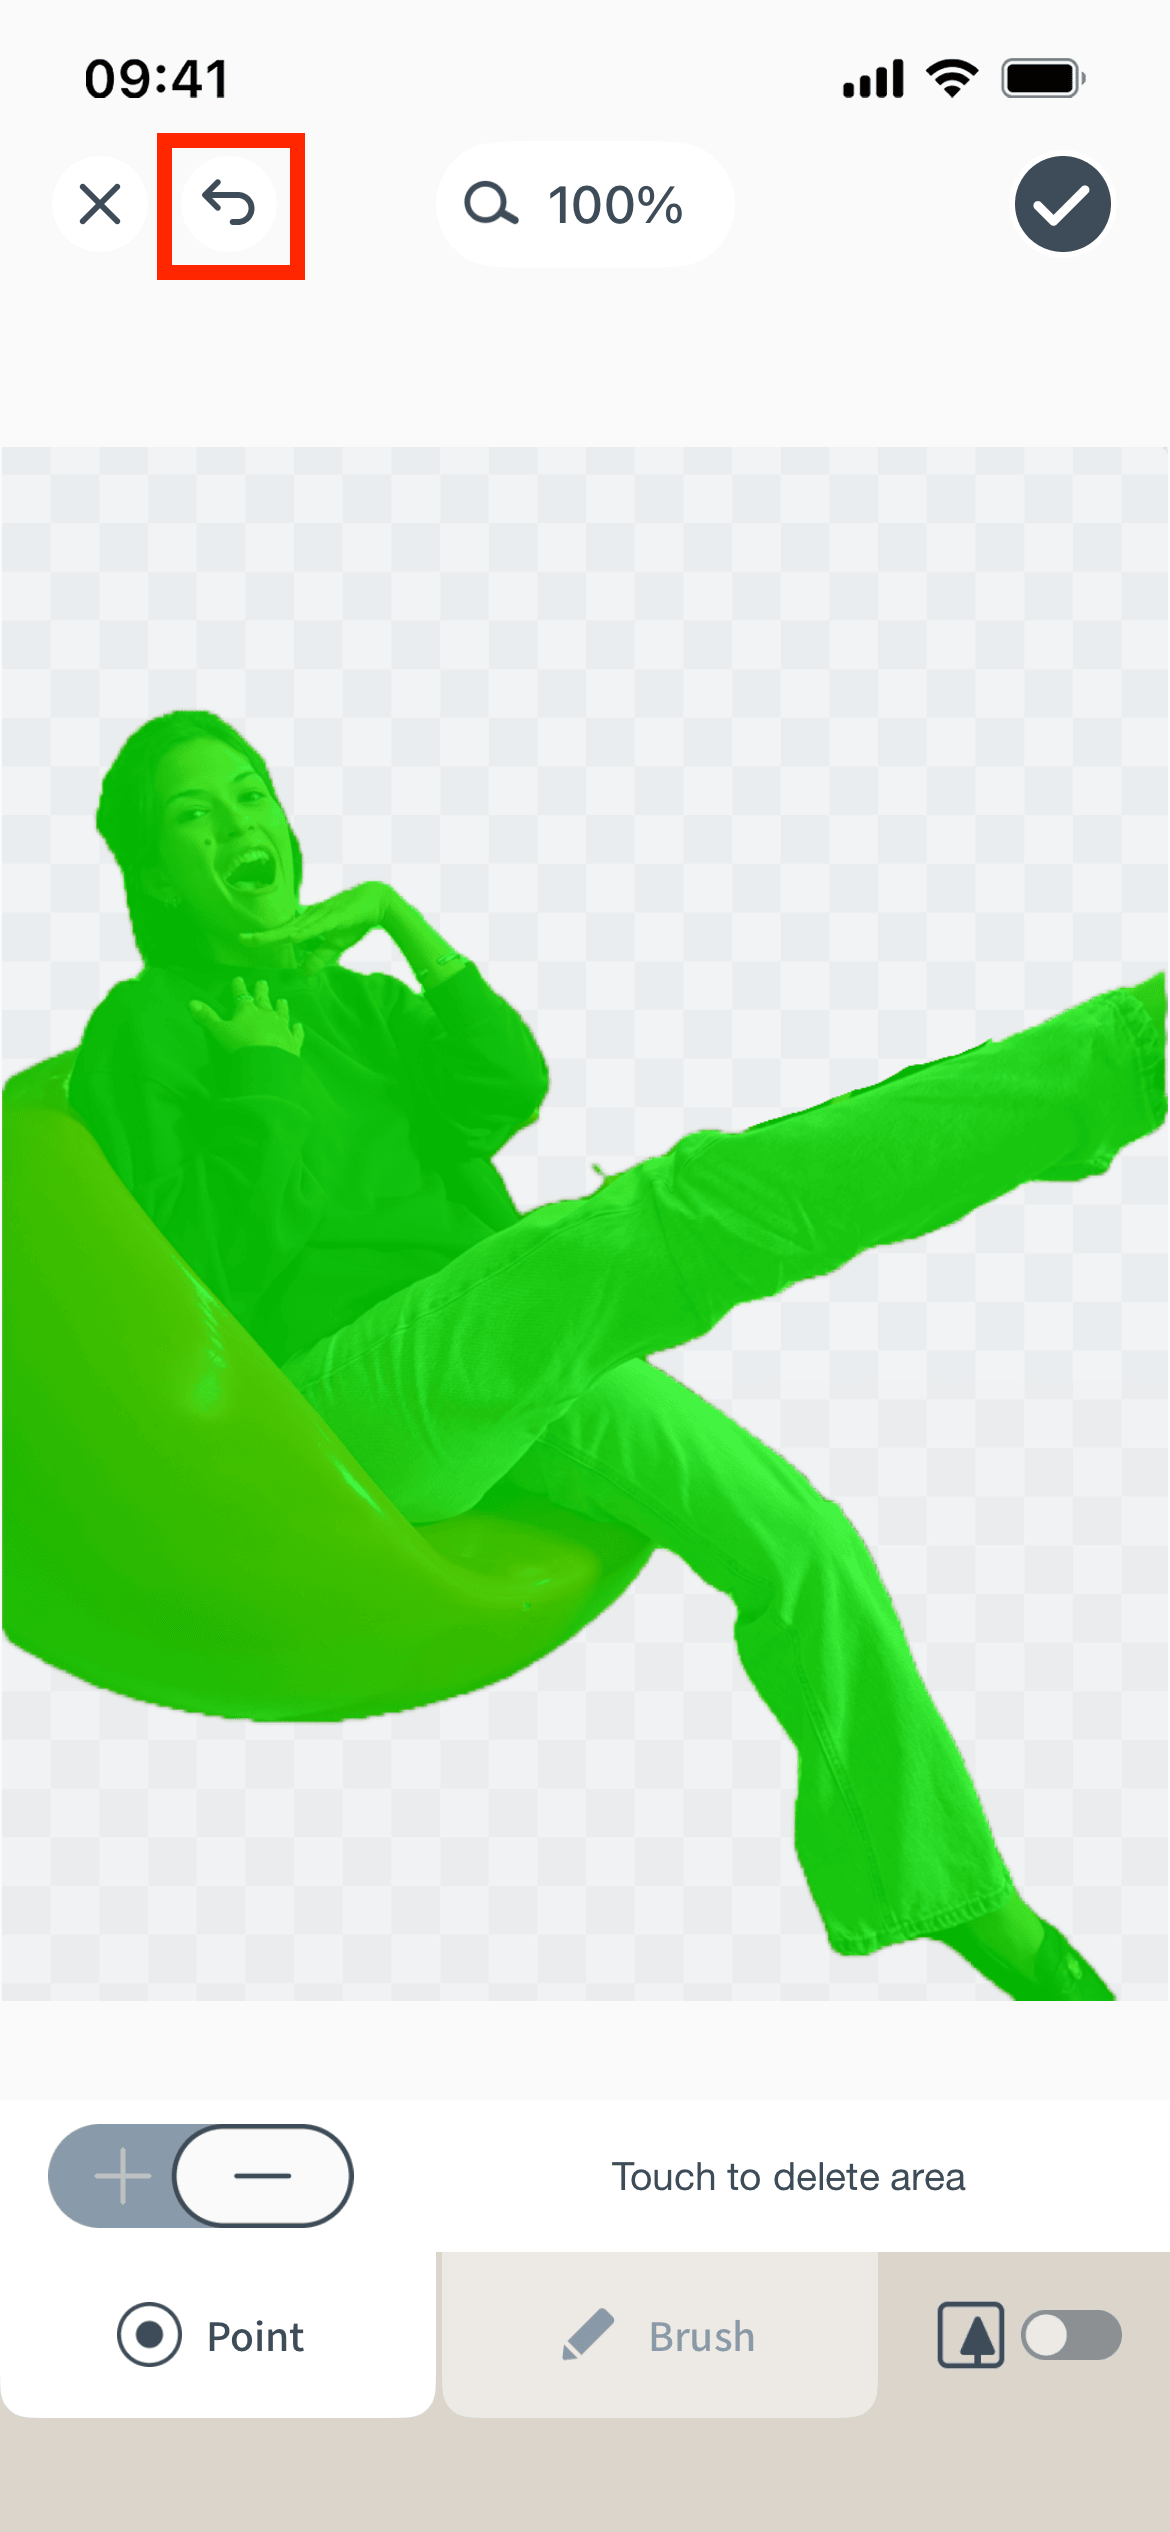
-
9)
When you’re finished, tap the “
 ” button in the upper-right corner.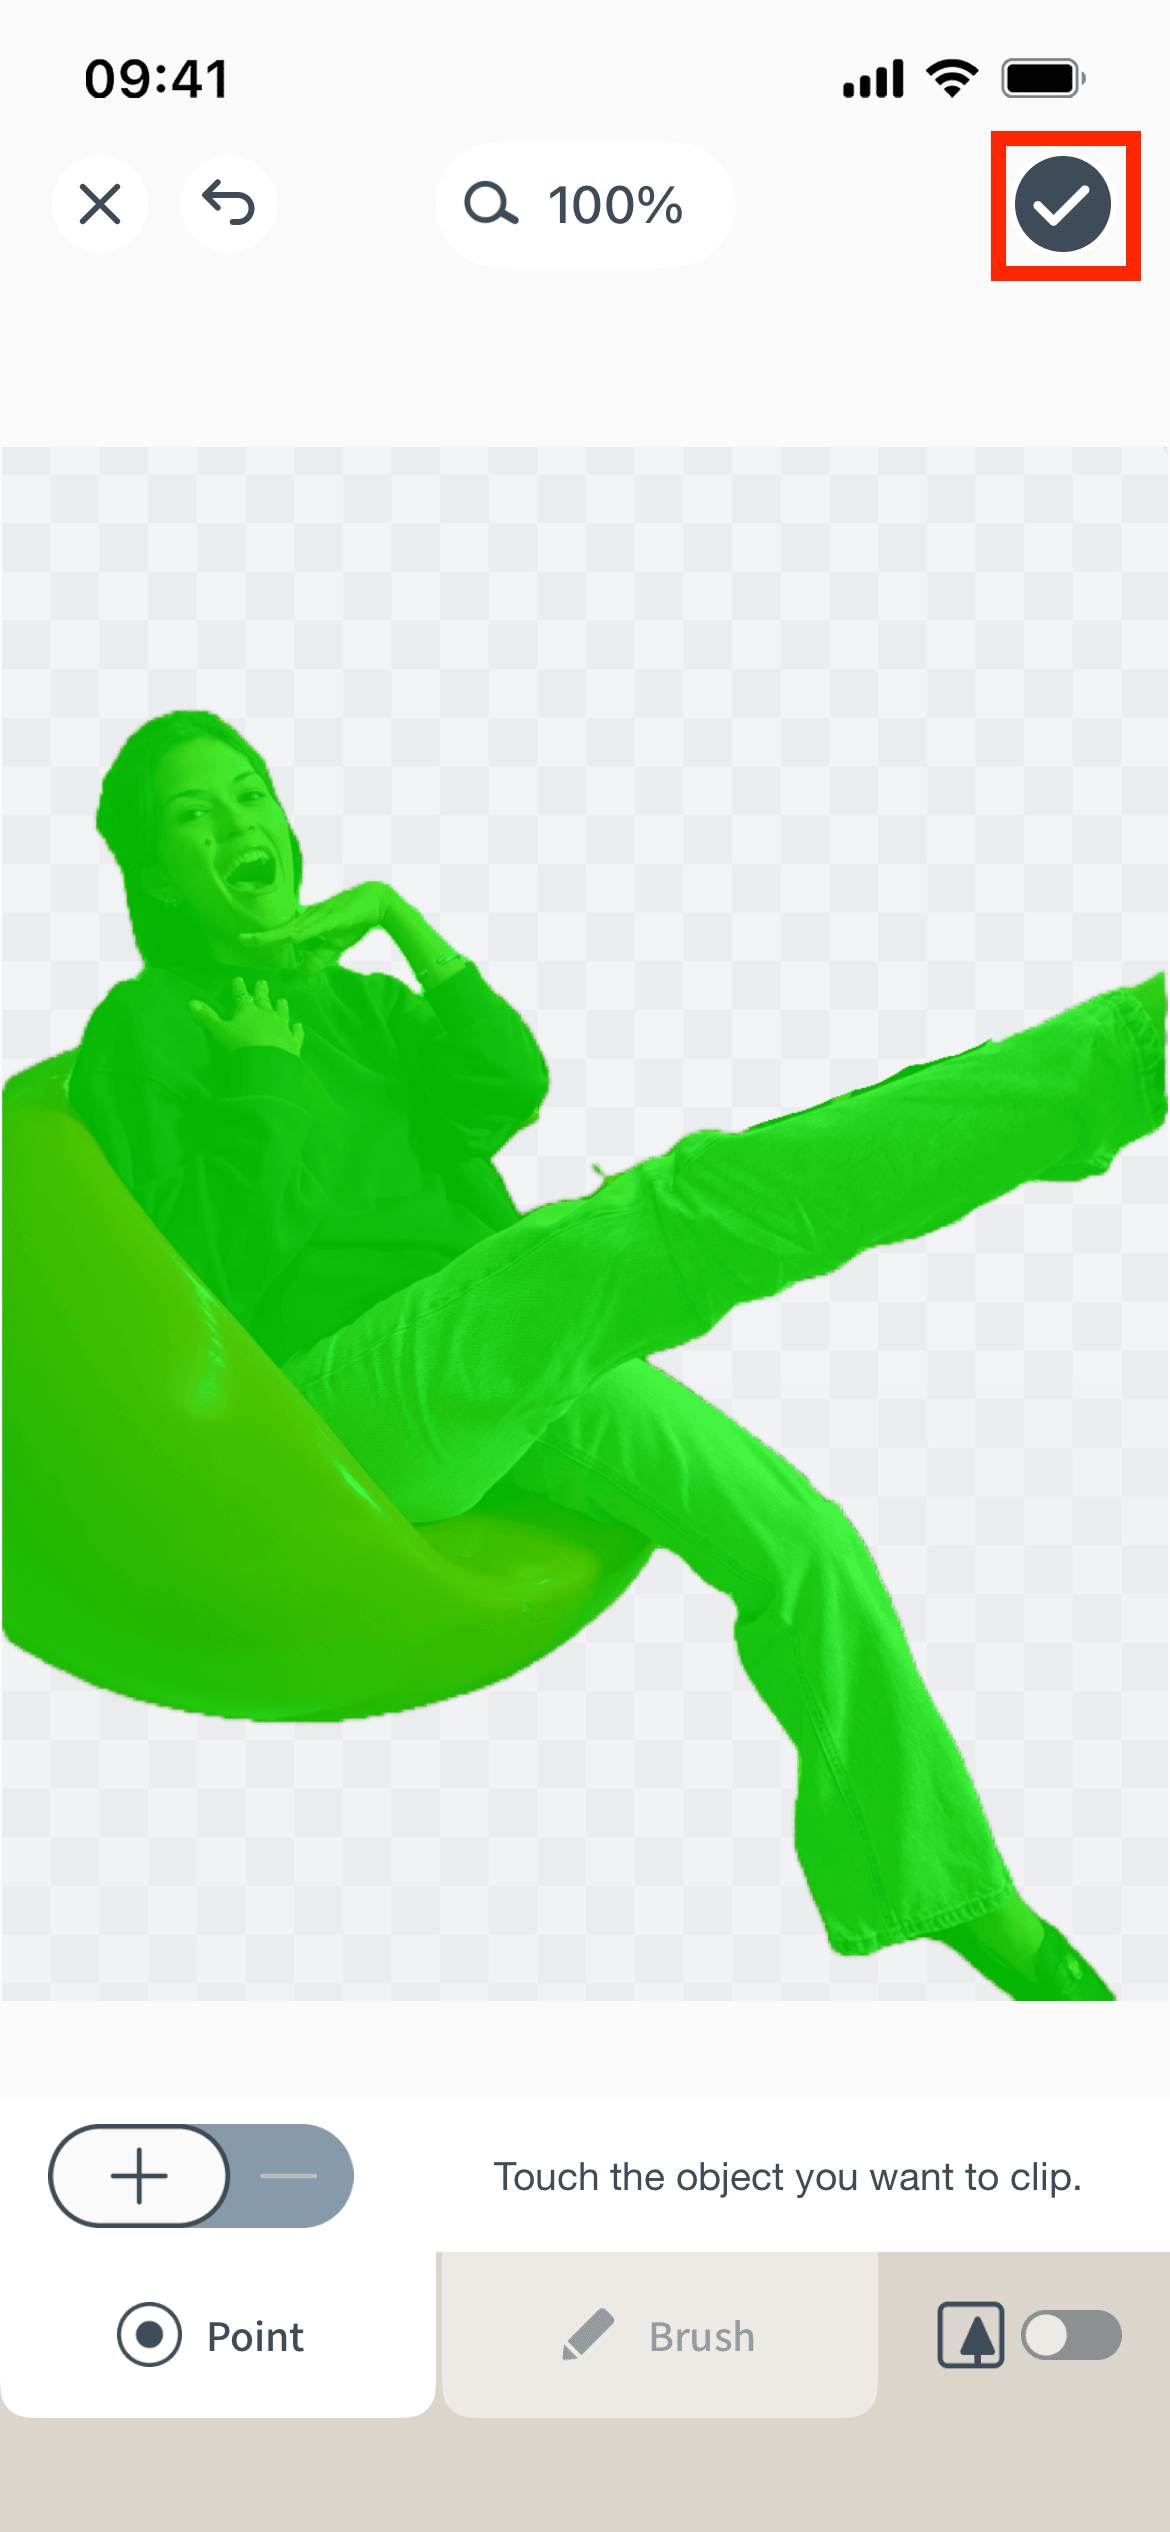
-
1)
-
Data from a QR code made with "Record Sound" or "Hidden Message" can be accessed for two years. During those two years, you can also save the data to your smartphone.
There is no limit for "Link to Website" and "Location Print" QR codes because that data links to existing websites and does not require access to our server. -
Up to five lines and 100 characters.
-
Up to two times for either.
-
Follow the procedure below.
-
1)
Launch the instax Link WIDE™ app and tap the icon on the upper right.
- 2) Once you are on the settings menu screen, tap “Record Sound / Hidden Message download settings.”
- 3) Select allow or don’t allow.
-
1)
Launch the instax Link WIDE™ app and tap the
-
Follow these simple steps:
- 1) First, make sure you have the latest version of the instax Link WIDE™ app.
- 2) On the smartphone you’re transferring data from, open the app and select “Settings” → “Print History Transfer Settings” → “Back up Data.”
- 3) Once the backup is complete, a QR code required to restore the data will be displayed. You can also save the QR code to your device’s Camera Roll.
-
4)
On the new smartphone, open the instax Link WIDE™ app and select “Settings” → “Print History Transfer Settings” → “Restore Data.”
Then, choose either “Scan QR Code” or “Import from Camera Roll” and follow the prompts to complete the data restoration.
*Please complete steps 1–4 within 48 hours. If 48 hours have passed, you will need to start the process over from step 1.
-
・Compatible models are listed below.
https://instax.com/link_print/en/-
・
If you are using “Xapp,” please follow the steps below.
1: Transfer the image you want to print from your digital camera and save it to your smartphone.
2: Launch the “instax Link WIDE™” app, load the saved image, and print it. -
・
If you are using “X-half,” please refer to this link.
https://www.fujifilm-x.com/en-us/products/software/x-half-app/
-
・
If you are using “Xapp,” please follow the steps below.
-
Please follow the laws and regulations of the country where you dispose of the product. If you have any questions, please refer to the online manual below or contact our support center.https://www.instax.com/link_wide_2/en/support/manuals/
-
Since these are dedicated apps, they cannot be used with other apps.